- Home
- Get started
- The grid method
How to get the outline on the paper using the pencil drawing grid method
Ready to start your coloured pencil drawing but feeling unsure about getting the outline right on your lovely paper?
Don't worry, it's a common hurdle, especially when you're starting out or working from photographs!
While freehand drawing is a great skill to develop over time, sometimes you just need a reliable way to create an accurate starting point.
The Grid Method is a fantastic, time-tested technique that artists use to do just that.
It helps break down a complex image into small, manageable squares, allowing you to focus on one section at a time. It's brilliant for improving accuracy and building your drawing confidence!
Here's how it works:
Prepare Your Reference Image Grid
You'll need a copy of the image you want to draw – usually a printout works well for this method.
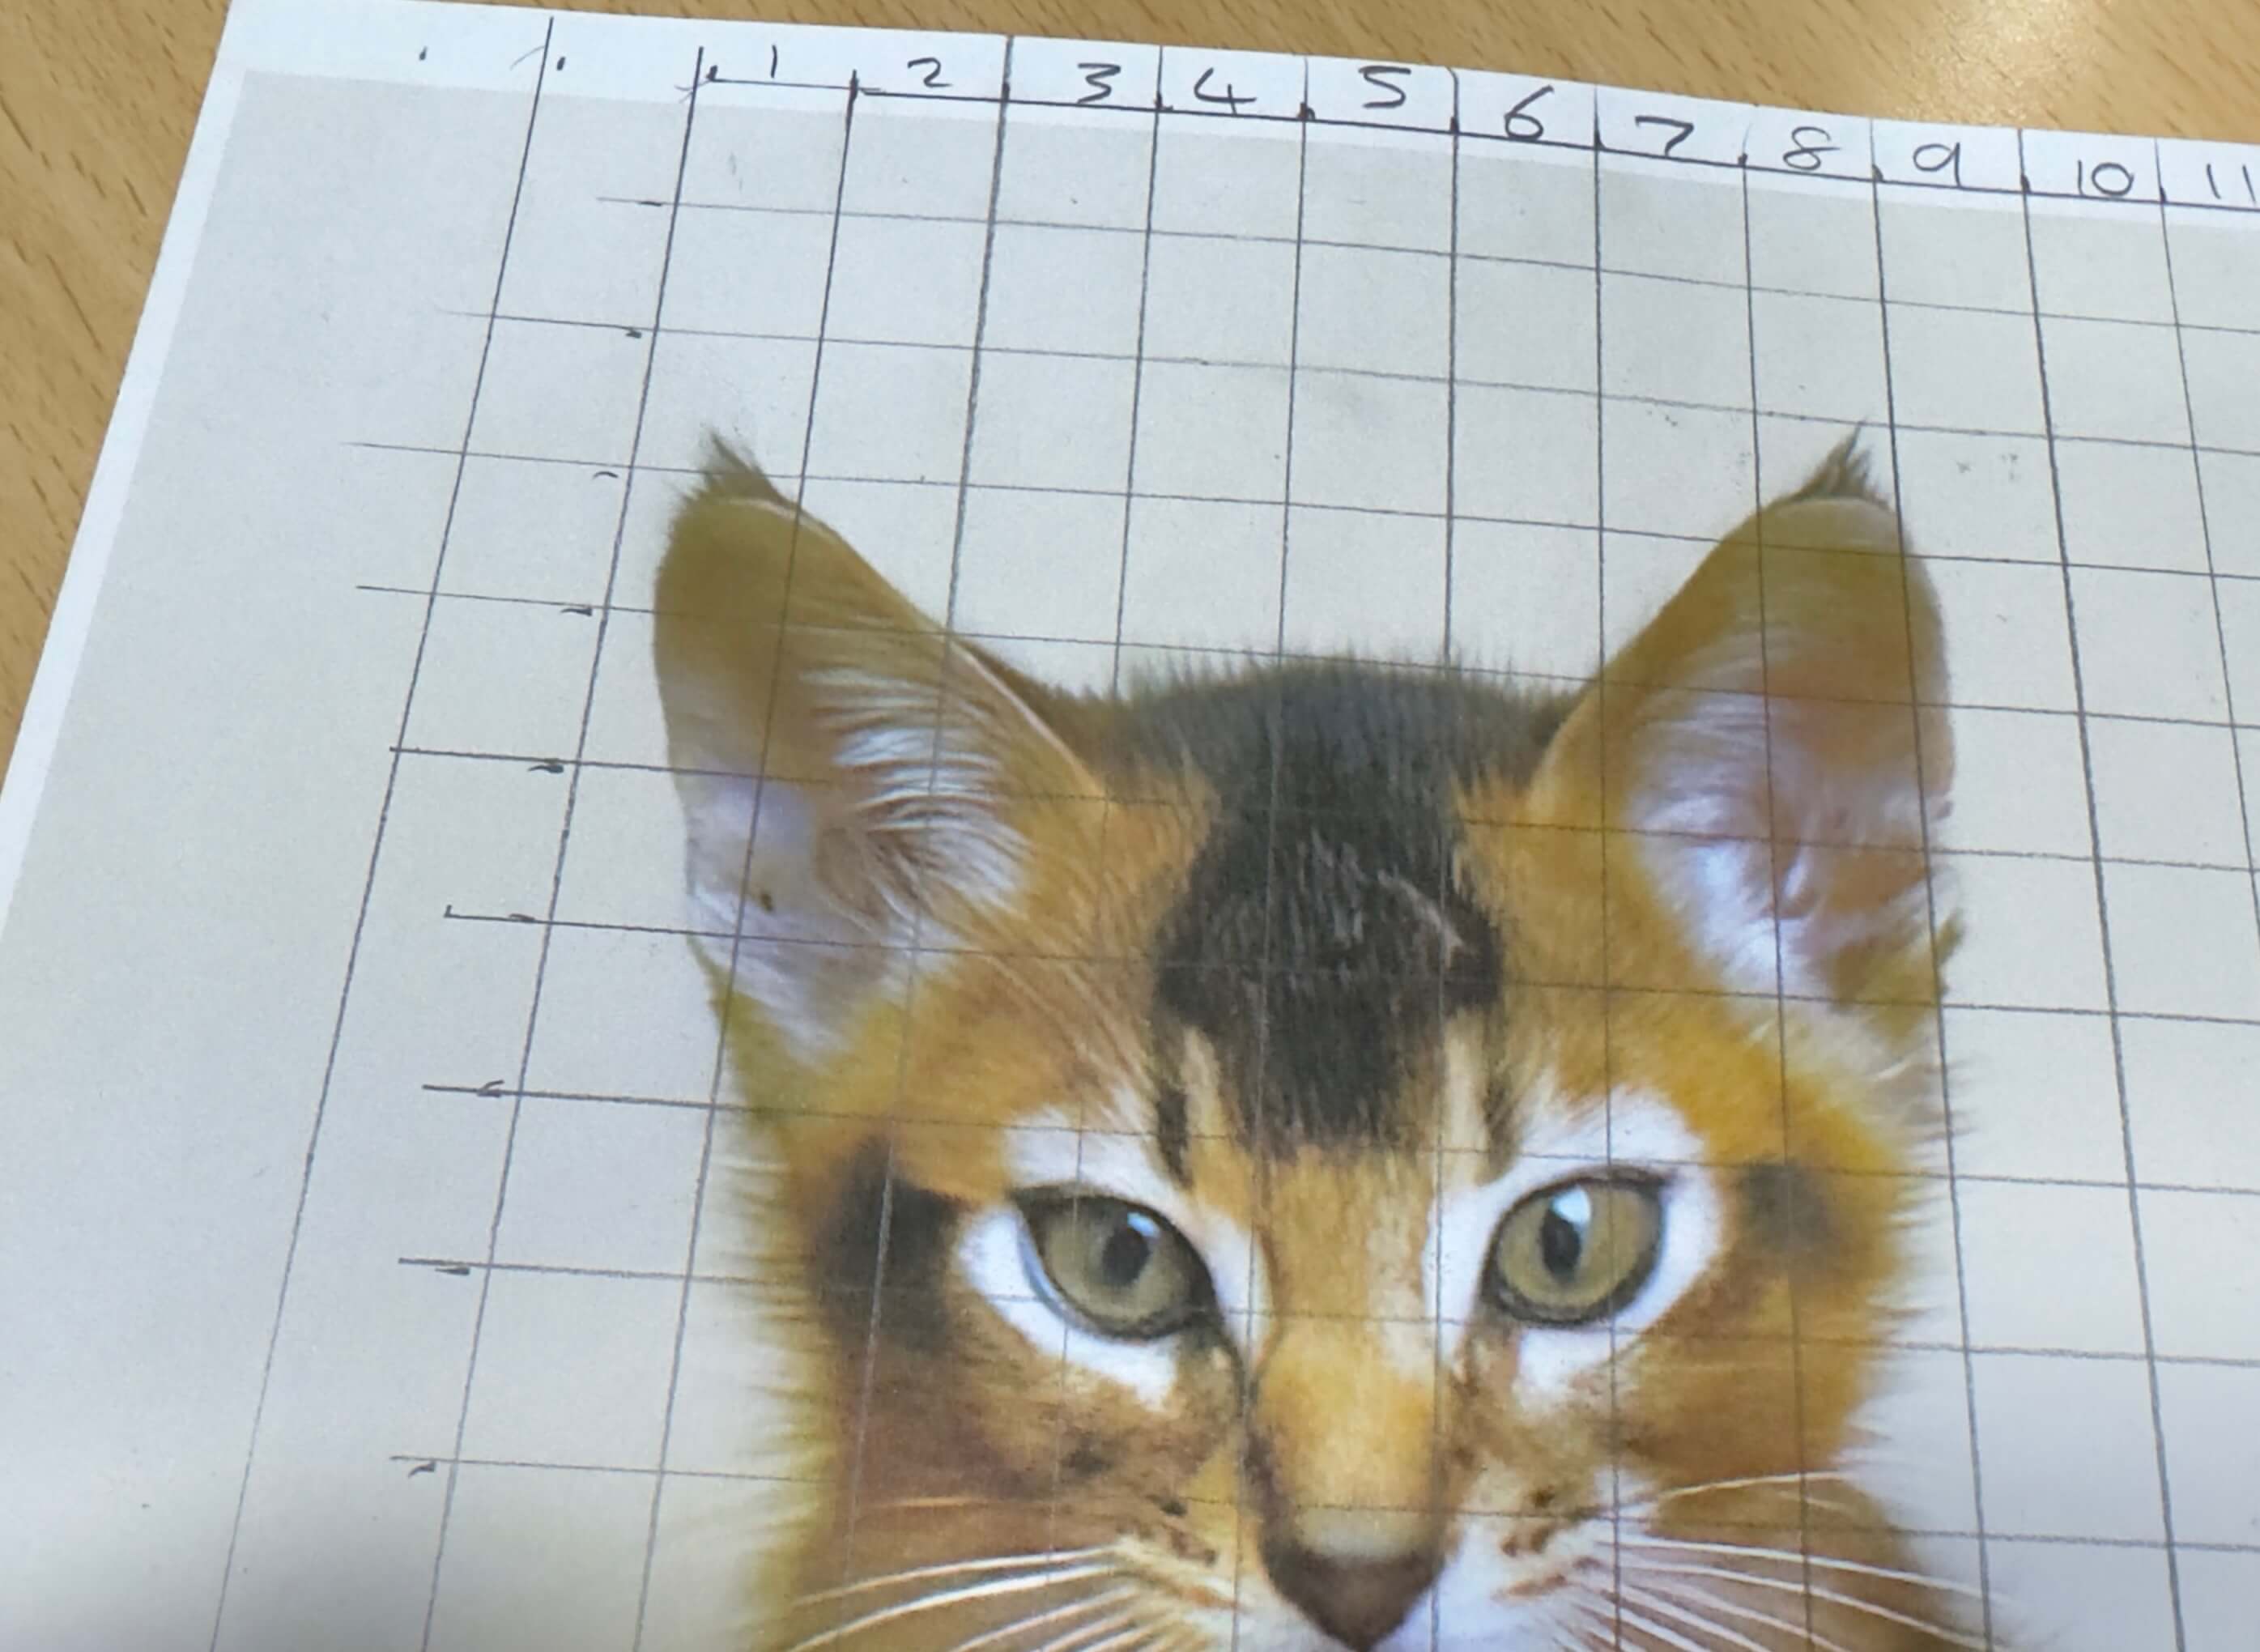
- Draw Your Grid: Using a ruler and a pencil (or fine marker), carefully draw evenly spaced horizontal and vertical lines over your reference photo copy. Squares of about 1cm or half-an-inch are often a good size, but you can adjust this depending on the complexity of your image – use smaller squares for more detailed areas if needed.
- Tip - Protect Your Photo: If you don't want to draw directly on your printed photo, you can place a sheet of clear acetate (like old-style overhead projector film or a clear plastic binder sleeve) over it and draw the grid on the acetate instead using a fine permanent marker. You can then reuse this gridded overlay!
- Numbering the squares can help when you come to transfer the outline onto your drawing paper.
 Adding the grid to your reference image helps break down the drawing into manageable sections.
Prepare Your Drawing Paper Grid
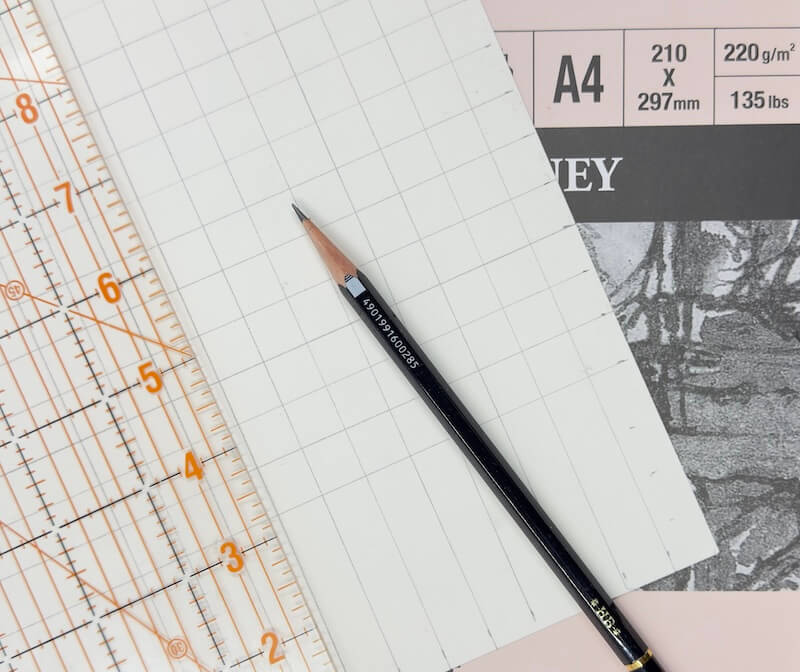
Now, you need to draw the same number of squares onto your final drawing paper. This is where you can easily resize your drawing!
Important Tip: Draw these lines VERY LIGHTLY using a graphite pencil that erases easily, like an HB or F grade. Pressing too hard can indent the paper, and using a soft (B grade) pencil might smudge and be difficult to erase completely later.
Same Size Drawing: If you want your drawing to be the same size as your gridded reference, simply draw the exact same size grid (e.g., 1cm squares) on your drawing paper.
Enlarging Your Drawing: To make your drawing bigger, draw larger squares on your paper. For example, if your reference grid used 1cm squares and you want your final drawing to be twice as large, you would draw 2cm squares on your drawing paper. Just make sure you have exactly the same number of squares across and down as on your reference grid!
 Drawing the corresponding grid onto your final paper. Remember to draw the exact same number of squares as your reference grid, even if you're making the squares larger to scale up your drawing.
Transfer the Drawing Square by Square
This is where the magic happens! It just requires patience and focus.
- One Square at a Time: Look closely at the first square (e.g., top left) on your reference grid. Pay attention to where the lines and shapes of your subject cross the edges of that single square.
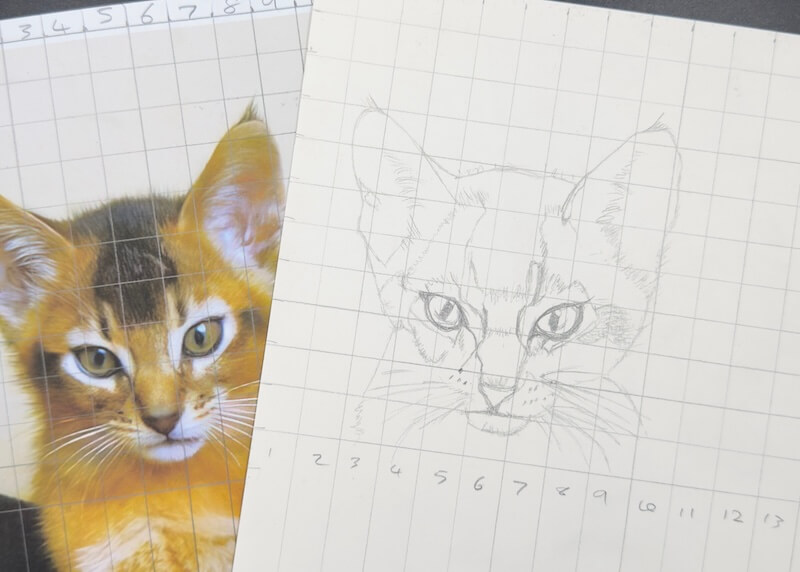
- Copy to Your Paper: Now, look at the corresponding square on your drawing paper grid. Carefully draw the lines and shapes you saw within that square, matching their positions relative to the grid lines.
- Focus Small: Don't think about the whole object yet! Just concentrate on accurately copying the lines within each individual square.
- Work Methodically: Continue copying the contents of each square from your reference to the matching square on your drawing paper. You might work row by row, or column by column – find a system that works for you. Your accurate outline will gradually appear!
- Tricky Bits? If one square contains a very complex area (like an eye or small detail), you can temporarily draw lighter diagonal lines or subdivide that one square into four smaller squares (on both the reference and your drawing paper) to give you more guidance for that specific area.
 Carefully transfer the outline from each square on your reference (left) to the matching square on your drawing paper (right).
Erase Your Grid Lines
Once you have transferred the main outline and are happy with its accuracy, it's time to remove the grid.
- Gently Erase: Using a kneaded eraser (the soft, putty-like type), gently dab or roll over the light graphite grid lines to lift them off the paper. Avoid scrubbing hard, as this could damage the paper surface (the 'tooth') needed for your coloured pencils. Your aim is to leave just your clean subject outline.
A Digital Grid Option
If you prefer working from a tablet or computer screen rather than a printout:
- Many drawing apps (like Procreate, Sketchbook etc.) or specific 'gridding apps' allow you to import your reference photo and overlay a digital grid directly onto the image.
- You can usually adjust the grid size, line colour, and thickness easily within the app.
- You will still need to draw the corresponding light graphite grid onto your physical drawing paper to copy into. This method just saves you printing the reference and drawing a grid on it manually.
In summary
The grid method does take a little bit of setup time, but it's a fantastic and reliable tool for building confidence and ensuring accurate proportions and placement in your drawings, especially when working from photo references.
It breaks down complexity and helps you tackle subjects you might otherwise find daunting.
While the grid method offers fantastic accuracy, especially if you need to resize your image, it does require patient setup.
Feeling like you might prefer a quicker way to get your outline onto the paper for now? Why not explore how to use tracing paper instead?
