- Home
- Core Coloured Pencil Techniques
Ready to learn core coloured pencil techniques?
Hello there, and welcome! If you've been working through the Foundation Skills Hub Introduction Page, congratulations – you've built a really solid base in the fundamentals of drawing, value, and colour theory. I'm so glad you're ready for the next step.
This "Core Techniques Hub" is where things get really exciting. It’s where we move from understanding the principles of art to mastering the practical skills needed to make your coloured pencil drawings truly come alive.
Bridging the Gap to Beautiful Art
Have you ever looked at a stunning coloured pencil piece – maybe one with incredibly smooth skin tones, vibrant colours that leap off the page, or textures so real you feel you could touch them – and wondered, "How on earth did they do that?"
Often, the answer lies in mastering a handful of core techniques.
These are the skills that bridge that frustrating gap between the picture you want to create and the one currently ending up on your paper.
They are the key to moving beyond drawings that feel flat, patchy, or perhaps a little 'childish', and stepping confidently into creating art that feels polished, impressive, and something you can be genuinely proud to show others.
That 'Wow!' reaction you're hoping for? It often starts right here!
What You'll Discover in This Hub:
What You'll Discover in This Hub:
In this section of the website, we'll break down the essential coloured pencil application techniques step-by-step:
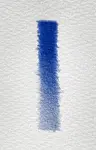
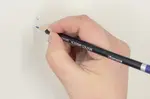
Basic Pencil Strokes and Control Page - We'll start with the very foundation – how to hold and control your pencils for consistent, predictable results.
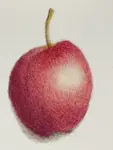
The Essential Guide to Layering Page - Discover the magic of layering lightly to build rich, luminous colour and avoid that dreaded 'muddy' look.
Blending Methods Page - Explore different ways to create seamless transitions and smooth out your pencil work effectively.
Burnishing Explained Page - Learn how and when to use burnishing for that final, polished intensity.
How to Fix Coloured Pencil Mistakes page - Find practical solutions for common hiccups like wax bloom, patchy blending, and more, so you can keep drawing with confidence.
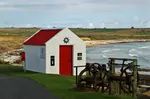
Challenge: The 6-Pencil Seaside Hut (A Study in Core Techniques) - Ready to put your skills to the test and see how core techniques combine to create a vibrant piece of work? Try Peter Weatherill's classic 'Limited Colour Palette Challenge'.
Your Path Through the Hub:
I strongly recommend working through these topics in the order presented, as each skill builds naturally on the last.
Take your time with the explanations and try out any suggested exercises – practice is where the real learning happens! Remember, my goal here is always to provide clear, practical guidance based on years of experience.
Mastering these techniques isn't about innate 'talent'; it's about understanding the process and putting it into practice.
It might take a little patience, but these skills are absolutely within your reach. Stick with it, be kind to yourself during the learning process, and I promise you'll start seeing a real difference in your artwork.
Ready to take control and make your pencils sing?
Let's get started:
➡️ Begin with Basic Pencil Strokes and Control

I'm Carol Leather, a coloured pencil artist for over 15 years. Most of my teaching comes back to the same idea: realistic coloured pencil starts with structure, light and observation long before the colour goes down.
My work has featured in Ann Kullberg's Color Magazine, CP Magic and Color Pencil Treasures (vol 7). I'm a member of the UKCPS and was a prize winner in the Nature section of their Annual Open Exhibition in 2020.
You might like these
How to Burnish Coloured Pencils: Tools, Technique & Common Mistakes
Burnish coloured pencils for smooth, intense colour without wrecking your layers. The right tools, timing, technique, and how to fix common mistakes.
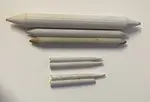
Paper Blending Stumps And Tortillons For Colored Pencil Art
The use of paper blending stumps in colored pencil art, providing a comprehensive guide to their application, benefits, and maintenance.
Limited Palette & Optical Mixing Tutorial froom Peter | Pencil Topics
Take Peter Weatherill's 6-pencil challenge! Master core coloured pencil techniques like layering for optical mixing, value creation & burnishing

Copyright © 2009- pencil-topics.co.uk All rights reserved
Home | About Us | Contact Us | Privacy Policy