- Home
- Fundamentals of Drawing
Learn the fundamentals of drawing for coloured pencil art
In short
The skills nobody taught us at school: how to see shape, work with value, read light and colour, and structure a picture. Eleven short guides grouped into three clusters. Pick whatever calls to you, or follow the natural sequence below.
I'm embarrassed to show this to you, but it does illustrate the issues I want to talk about here. I painted it in my teens and for some reason, kept it. I'm sure the idea back then wasn't as an example of what I had done wrong, but here goes.
A wonky bottle and jug that looks like it's about to slide out of the picture? I can't criticise the accuracy of the vegetable shapes, but they look to me like cutouts pasted to the picture surface. Aren't carrots supposed to be vaguely cylindrical? And what on earth is that brown blob at the back supposed to be? An onion? A potato?
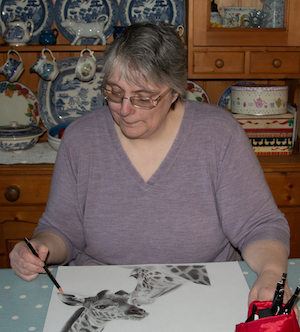
A painting of mine, from my teens. I kept it. Now I'm glad I did.
A good 45 years has passed since that old painting. But after finding it, I found myself looking, really looking, at the things around me. Then I closed my eyes and picked them up.
Did it have curves, hollows, bumps? Could I find a corner? Was there a far side that my fingers could touch, but my eyes wouldn't see?
Drawing the outer shape was no longer enough. I started wondering how my eyes made sense of the things I had felt.
What I could see depended on the light. If something curved away from the light I could no longer see it. But unless the surface changed abruptly, there was a gradual change from light to dark.
Where were these transitions in my drawings? Were they from the darkest dark to the lightest light, or more subtle?
That's the moment I'd been missing: nobody had taught me about value, light and shadow, colour, composition, perspective. They weren't covered. Once I started learning them properly, my drawings changed.
What's inside this hub
I've broken the foundations into eleven short guides, each focused on one piece of the puzzle. You can read them in any order, but if you want a path, work through these three clusters in sequence: see, then understand light and colour, then structure your picture.
1. See like an artist
Train your eye before you start a drawing. Observation, planning, and choosing references that will actually work.
Learn to see like an artist: simplify subjects into basic shapes, refine proportion, and sharpen your observation. Also covers using graphite for initial sketches suited to coloured pencils.
How to choose useful references, interpret them (not just copy), make helpful adjustments, with notes on UK copyright considerations.
A little planning pays off. Simple still-life setup, choosing a harmonious palette, and deciding your overall approach before you start layering.
Quick, tiny drawings for testing compositions and planning values. One of my favourite time-savers for avoiding major changes later.
2. Value, light and colour
How your drawings get their sense of three dimensions. For most returning artists, this is the single biggest shift.
Understanding value (light and dark)
Value is often the most important factor in creating solid, 3D-looking objects. Value scales, highlights, mid-tones, and shadows, and how to build convincing form with pencils.
The difference between form shadows and cast shadows, and how softer transitions create more convincing depth in coloured pencil work.
Why shadows aren't grey, and how complementary colour makes your drawings look more 3D.
Colour basics for coloured pencils
The colour wheel, hue/value/saturation, layering for optical mixing, using complementary colours in shadows (goodbye mud), and warm/cool contrasts for depth.
3. Structure and composition
How to arrange what you're drawing on the page so it reads correctly to the viewer's eye.
Practical rules for arranging elements in your drawing space: Rule of Thirds, balance, and creating a strong focal point that makes your artwork more impactful.
Another composition tool, demystified. Practical ways to compose with the Golden Section for more balanced and visually compelling pieces.
One-point and two-point perspective explained simply. These tools create believable depth so scenes and objects read correctly in 3D space.
When you've worked through these
Working through these topics may feel like a detour from your pencils. It isn't. This is where the foundations sit, the things nobody taught you the first time round.
Take them at your own pace. The point isn't to master each one before moving on. The point is to understand what each one is, so when you're drawing and something doesn't look right, you have a place to look for the reason.
When you've worked through enough to feel the difference, the next hub picks up here.
If you haven't already worked through the practical setup (supplies, sharpening, drawing space, pressure control), start here.
Where the foundations meet the pencil. Layering, blending, burnishing, and the techniques that turn understanding into finished work.
When you're ready to put it all together on a real project, Peter Weatherill's tutorials show the full process from start to finish.
Which pencils suit which way of working, and what's worth your money as you progress beyond a starter set.
Copyright © 2009- pencil-topics.co.uk All rights reserved
Home | About Us | Contact Us | Privacy Policy