- Home
- Core Coloured Pencil Techniques
- Layering Coloured Pencils
How to Layer Coloured Pencils for Rich, Vibrant Colors (Without the Mud)
You're carefully building up colour on what should be a beautiful red rose. Layer by layer, you add more pigment, expecting rich, vibrant petals. But instead of the glowing red you envisioned, you're staring at a dull, muddy mess that looks more like dried blood than a flower.
Sound familiar?
I used to think the problem was my pencils. Surely if I bought more expensive ones, the colours would magically become richer and cleaner.
But after spending loads on premium sets that produced the same disappointing results, I realized the truth: it wasn't my tools—it was my layering technique.
Proper layering is the foundation of every impressive colored pencil drawing you've ever admired.
It's how artists achieve those impossibly rich colours, smooth transitions, and realistic depth that makes you wonder if they used some secret technique you've never heard of.
The good news?
There's no secret. Just a systematic approach to building up colour that, once you understand it, will turn your coloured pencil work from flat and lifeless to vibrant and dimensional.
In this guide, I'll show you exactly how to layer colours for maximum richness without creating muddy disasters, when to apply pressure (and when not to), and how to build up realistic colour complexity that rivals traditional painting.
Essentially, layering allows you to achieve a painterly richness and complexity that's difficult to get otherwise.
Is Your Layering Approach Right for Your Goals?
Before diving into technique, let's make sure you understand when layering is essential and when it might not be the best approach.
Use Systematic Layering When You Want To
- Create rich, saturated colours that look vibrant and alive, not flat or weak
- Build realistic colour complexity like the subtle variations in skin tones or flower petals
- Achieve smooth colour transitions between different hues or values
- Mix colors optically on paper (creating greens from blues and yellows, for example)
- Develop depth and dimension that makes your subjects look three-dimensional
- Avoid muddy, lifeless colors that plague many colored pencil attempts
Perfect for: Realistic portraits, detailed still life, botanical illustrations, any subject where color richness and accuracy matter.
When Layering May Not Be Your Priority
- Quick sketches or studies where speed matters more than perfect colour
- Very textured subjects where individual pencil strokes add to the realism
- Graphic or stylized work where flat colour areas are intentional
- When working on rough paper that won't hold many layers effectively
The Reality Check
Layering is a skill that requires patience and practice.
If you're rushing to see immediate results, you'll likely create the muddy colors we're trying to avoid. This technique rewards slow, methodical work—but the results are worth the investment in time.
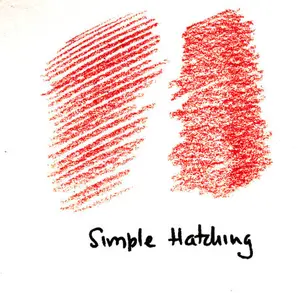
The Crucial Role of Pressure
As we discussed on the Basic Strokes and Control Page, pressure control is vital. In layering, it's non-negotiable!
The Role of Pressure in Layering Coloured Pencils
As you experiment with layering coloured pencils, you'll realise that pressure plays a vital role in achieving the desired effects. Mastering pressure control allows you to create a range of effects, from subtle nuances to dramatic contrasts.
By combining light and bold strokes, you can add depth and dimension to your artwork. To achieve the desired outcome, remember to balance your techniques and experiment with varying pressures and layering.
 Blue pressure bar
 Adding a light layer of yellow over the blue
Creating New Colours with Layering (Optical Mixing)
Unlike paint, you can't physically mix coloured pencil pigments before applying them. Instead, we rely on optical mixing.
Layering them can achieve stunning effects and unique hues in your artwork.
If you’re using a different pencil brand, a colour comparison chart can help you find close substitutes for the colours in your layering sequence.
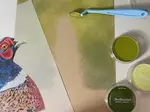
Seeing Layering in Action
Let me show you exactly what I mean with a practical example. I created this step-by-step demonstration using Faber Castell Polychromos pencils on hot-pressed watercolor paper to show how each layer affects the overall result.

Starting with a light Pine Green foundation, watch how each subsequent color - Grass Green, Dark Cadmium Yellow, Light Green, and so on - modifies that original base color.
Notice how even after adding seven different colors, including the dark Sepia at the end, the result is still fundamentally green. That Pine Green foundation influenced everything that came after.
This perfectly illustrates why your first layer is so crucial - it sets the color foundation for everything that follows. Each new layer doesn't replace what's beneath; it filters and modifies it.
Try this same exercise yourself with any base color. You'll be amazed at the range of subtle variations you can achieve from just one foundational hue!
These same layering methods become even more useful when you work with a limited colour palette and rely on optical mixing to create extra variety.
What Supplies Do UK Artists Need for Successful Layering?
Let's talk about the practical considerations for UK artists wanting to master layering.
Paper That Actually Works for Multiple Layers
Strathmore 400 Series Drawing Paper
- Where to buy: Jackson's Art Supplies, Amazon UK
- Price range: £15-25 for pad
- My experience: Good tooth, holds 4-6 layers reliably, excellent value
- Best for: Learning layering without expensive paper investment
Fabriano Artistico (Hot Press)
- Where to buy: Most UK art suppliers
- Price range: £20-35 for pad
- My experience: Smooth surface, excellent for fine detail, holds many layers
- Best for: Detailed realistic work, botanical studies
Daler Rowney Heavyweight Cartridge
- Where to buy: Hobbycraft, local art shops
- Price range: £8-15 for pad
- My experience: Budget-friendly option, adequate for practice
- Best for: Learning technique before investing in premium paper
Which Pencils Work Best for UK Artists Learning to Layer?
Budget-Conscious Approach for Learning
- Derwent Coloursoft (12-24 colors) - £25-45
- Faber-Castell Polychromos (12-24 colors) - £30-50
- Combination approach: Start with these, add individual colors as needed
Why This Matters Layering technique matters more than pencil brand. I've seen beautiful layered work done with £15 sets and disappointing work with £200 sets.
How Do You Layer Coloured Pencils Effectively?
Here's the systematic approach I teach all my students:
Step 1: Plan Your Color Strategy
Before touching pencil to paper, identify:
- Your lightest light (often the paper itself)
- Your darkest dark (plan where this will be)
- Your main colour families (warm vs. cool areas)
- Areas that will need the most layers (usually shadows and rich color areas)
Step 2: Start with Your Lightest Colours
This is crucial—always work light to dark in layering. Begin with:
- Light base tones (pale yellows, light pinks, soft blues)
- Very light pressure—you should see paper texture through the colour
- Even coverage across the area you're developing
Step 3: Build Up Systematically
Each subsequent layer should:
- Use slightly more pressure than the previous layer (but still light to medium)
- Cover a slightly smaller area (building toward your focal points)
- Consider color temperature (cool colors recede, warm colors advance)
Step 4: Preserve Your Highlights
As you build layers, protect your lightest areas by:
- Stopping before you cover them completely
- Using masking techniques if necessary
- Remembering that you can't make white areas whiter—plan them from the start
Step 5: Final Rich Layers
Your last layers can use more pressure to:
- Intensify the darkest darks
- Refine color accuracy
- Create final colour transitions

What Are the Essential Layering Guidelines?
- Start Light, Build Slow: This is the golden rule!
- Keep Your Pencils Sharp: Especially for initial layers, a sharp point applies colour precisely without prematurely flattening the tooth.
- Vary Stroke Direction: Applying layers in different directions helps create smoother results.
- Choose Suitable Paper: Paper with some tooth (texture) is essential for holding multiple layers. Smoother papers allow fewer layers.
- Consider Your Colours: Think about how colours interact. Layering similar colours (analogous) creates smooth shifts. Layering opposites (complementary) dulls colours or creates neutral tones – useful for shadows when used carefully! (You can find more about basic colour theory here).
- Preserve Highlights: Plan where your lightest areas will be and apply fewer layers there, letting the paper's white show through.
Why Do My Layers Always Turn Muddy?
Mistake 1: Pressing Too Hard Too Early
Problem: Flattens paper tooth, prevents additional layers
Signs: Your second layer won't stick, or colors look patchy
Solution: Practice pressure control—initial layers should barely tint the paper
Mistake 2: Wrong Layer Order
Problem: Starting with dark colors or working dark-to-light
Result: Muddy, dull colors that look overworked
Solution: Always work light-to-dark, building intensity gradually
Mistake 3: Impatient Color Building
Problem: Trying to achieve full intensity in 1-2 layers
Result: Flat, lifeless color without depth
Solution: Plan for 4-6 layers minimum for rich color areas
Mistake 4: Poor Color Planning
Problem: Layering incompatible colors without understanding color theory
Result: Unintentional neutrals, muddy mixtures
Solution: Understand basic color relationships before experimenting
How Do I Fix Common Layering Problems?
- You're likely using too many different hues in one area
- Try limiting yourself to 2-3 color families per area
- Work more systematically light-to-dark
"I can't get rich, dark colors"
- You may be pressing too hard too early, preventing buildup
- Try more layers with lighter pressure instead of fewer heavy layers
- Consider your paper choice—some papers don't hold many layers
"My layers look patchy and uneven"
- Likely a pressure control issue—work on consistent light pressure
- Try varying stroke direction slightly between layers
- Ensure your pencils are sharp enough for even coverage
"New layers won't stick to my drawing"
- Paper tooth is probably full—you've reached the limit
- This is normal after 4-6 layers on most papers
- Consider this the completion point rather than a problem
What Should I Learn After Mastering Layering?
Layering is fundamental, but it works best when combined with other essential skills:
What Other Skills Support Good Layering?
- Master basic pencil strokes and pressure control - You need consistent pressure for successful layering
- Understand color theory basics - Know which colors enhance vs. neutralize each other
- Choose the right paper for layering - Paper choice dramatically affects how many layers you can achieve
Which Advanced Techniques Build on Layering?
- Learn blending techniques - Smooth your layered colors for professional results
- Master burnishing - The final polish for ultimate richness and smoothness
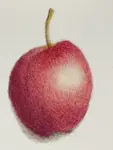
What Can I Practice This Week?
Choose a simple subject with rich color—maybe a red apple or orange.
Using only 3 pencils (light, medium, and dark versions of your main color), practice building up color through layering.
Start incredibly light and build gradually. You'll be amazed at the richness you can achieve with this systematic approach.
Still Struggling with Muddy Colors?
You're not alone—this is the most common challenge I hear about from colored pencil artists.
The frustration is real, but so is the solution.
Often it's a small adjustment in technique or color choice that makes the difference between mud and magic.
What's your biggest layering challenge right now? Drop me a line—I read every email and often turn common questions into helpful tutorials. Whether it's color choices, pressure control, or knowing when to stop, I'd love to help you work through it.
Remember: every professional colored pencil drawing you admire was built layer by layer, just like you're learning to do. The patience you invest now will pay dividends in every piece you create going forward.

I'm Carol Leather, a coloured pencil artist for over 15 years. Most of my teaching comes back to the same idea: realistic coloured pencil starts with structure, light and observation long before the colour goes down.
My work has featured in Ann Kullberg's Color Magazine, CP Magic and Color Pencil Treasures (vol 7). I'm a member of the UKCPS and was a prize winner in the Nature section of their Annual Open Exhibition in 2020.
You might like these
Top Meethods of. Blending Coloured Pencils Smoothly - Pencil Topics
Learn key methods for blending coloured pencils: stumps, blender pencils and solvents. Achieve smooth transitions for professional, realistic artwork.
How to Burnish Coloured Pencils: Tools, Technique & Common Mistakes
Burnish coloured pencils for smooth, intense colour without wrecking your layers. The right tools, timing, technique, and how to fix common mistakes.
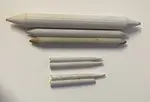
Paper Blending Stumps And Tortillons For Colored Pencil Art
The use of paper blending stumps in colored pencil art, providing a comprehensive guide to their application, benefits, and maintenance.

Copyright © 2009- pencil-topics.co.uk All rights reserved
Home | About Us | Contact Us | Privacy Policy