- Home
- Choosing pencil brands
- Derwent Inktense
How to Use Derwent Inktense Pencils
In short
Derwent Inktense pencils are water-soluble ink pencils that turn permanent once they dry, so you can layer without disturbing the colour beneath. Let each layer dry fully, tone the bright colours down with water, and you can use them on paper and on fabric.
As a coloured pencil artist, I adore the endless possibilities that come with layering. There is something so satisfying about building up rich, velvety tones with each careful stroke.
Watercolour pencils offer a taste of that layering joy, but there is a catch. Have you ever noticed how adding another layer can sometimes disturb the pigment below? One moment you are layering, and the next you are making a right mess as the new colour mixes with the old.
For the full set of watercolour pencil guides and tutorials, visit the watercolour pencils learning pathway.
Enter Derwent Inktense Pencils
Now, let me introduce you to Inktense pencils by Derwent. Unlike traditional watercolour pencils, these use water-soluble ink. Once activated and dried, the ink becomes permanent. You can layer away to your heart's content without muddying the waters.
But (and isn't there always a but?) you must make sure the ink is fully activated. Even a tiny dry dot can reactivate with the next wash, potentially wreaking havoc on your work.
The golden rule: Wait until each layer is bone dry before adding more ink. Rushing on damp paper causes unwanted bleeding and blending. I learned this the hard way.
This does not mean wet-in-wet techniques are off-limits. In fact, blending while wet creates stunning soft gradients and unexpected colour mixes. Just remember, once you are happy with the effect, let that layer dry completely before working on top of it.
Waiting in the Wings
Here is the funny part: I had a tin of Inktense pencils sitting in my studio for ages before I finally gave them a go.
I had heard about their intense, bright colours, which put me off. I mainly paint landscapes and animals, not subjects known for neon hues.
One day, I finally experimented. I immediately regretted not trying them sooner. The colours are vibrant, but I discovered they could be beautifully toned down. By mixing pigment with plenty of water, often on a palette, I achieved soft, natural hues.
In other words, those intense colours were far more versatile than I had given them credit for. With a few careful layers, a bit of blending, and plenty of drying time, suddenly these pencils found their place in my landscape and wildlife work.
Some of the soft, neutral hues you can mix from Inktense pencils
Can You Use Derwent Inktense Pencils on Fabric?
One of the most exciting discoveries I made with Inktense pencils is that they can be used on fabric, including delicate materials like silk. The permanent ink adheres beautifully, opening up a world of textile art possibilities.
My first project was a nativity scene on silk for a Christmas card. The vibrant colours and smooth silk allowed for lovely blends and fine details.
When it comes to choosing fabrics, natural fibres like silk, cotton and linen work best. I always pre-wash mine in case of shrinkage, and iron it flat before I start.
To begin, I tape my fabric down on my light pad and trace the outlines using a water-soluble graphite pencil or the Derwent Inktense outliner pencil (included in your tin), which gives crisp lines that do not dissolve.
From there, the method is much like working on paper, with a couple of fabric-specific things to keep in mind:
- Work on a hard surface with an absorbent layer underneath, so excess water has somewhere to go.
- Build colour gradually. Inktense reads even stronger on fabric than on paper, so start light and add more.
- Activate thoroughly. Any pigment left dry can move later, so work the water right through each area.
- Heat-set when it is completely dry. Press with a hot iron (use a pressing cloth to protect the fabric) to fix the colour so it stays put and survives gentle washing.
Prefer Working on Paper?
Choosing the right paper makes a world of difference with Inktense pencils. Since these pencils turn into vibrant, water-soluble ink, your paper needs to handle moisture well. Here are some options:
- Inktense paper: Derwent's 300gsm paper, similar in texture to NOT (cold-pressed) watercolour paper. Thick enough to prevent buckling, with a texture that grips the pigment.
- Khadi paper: my swatches were done on 200gsm Khadi, a handmade 100% cotton paper. Its lovely texture holds pigment and withstands water. Not as thick as Inktense paper, but ideal for experimenting.
- Mixed media paper: a more affordable option. Look for at least 200gsm. It may not handle as many layers, but it is great for practice.
Note: the links above are affiliate links. If you use them to make your purchase, you help support this site at no extra cost to you.
Avoid thin sketch paper, printer paper and low-quality watercolour paper. Tape down lighter-weight papers, and always test first. I enjoy the texture of Khadi or NOT paper, but I have to make sure all the pigment is activated, as it can get trapped in the paper's tooth.
Soft Inktense mixes, well diluted on textured paper
Painting With Inktense Pencils
To turn your drawing into a painting you will need an assortment of brushes. Your brush choice influences pigment activation, spread and blending. Here are some types to consider, with tips on when to use them:
- Round brushes: small rounds (size 4 or 6) for controlled activation; larger rounds (size 8 or 10) for broad washes. Excellent for details and blending small areas.
- Flat brushes: small to medium flats (size 6 or 8) cover larger areas or create straight edges. Ideal for even washes and defined lines.
- Water brushes: these have a refillable water reservoir, perfect for outdoor sketching. Derwent's own brand works exceptionally well.
- Detail brushes: sizes 0 to 2 are perfect for fine details like fur or feathers.
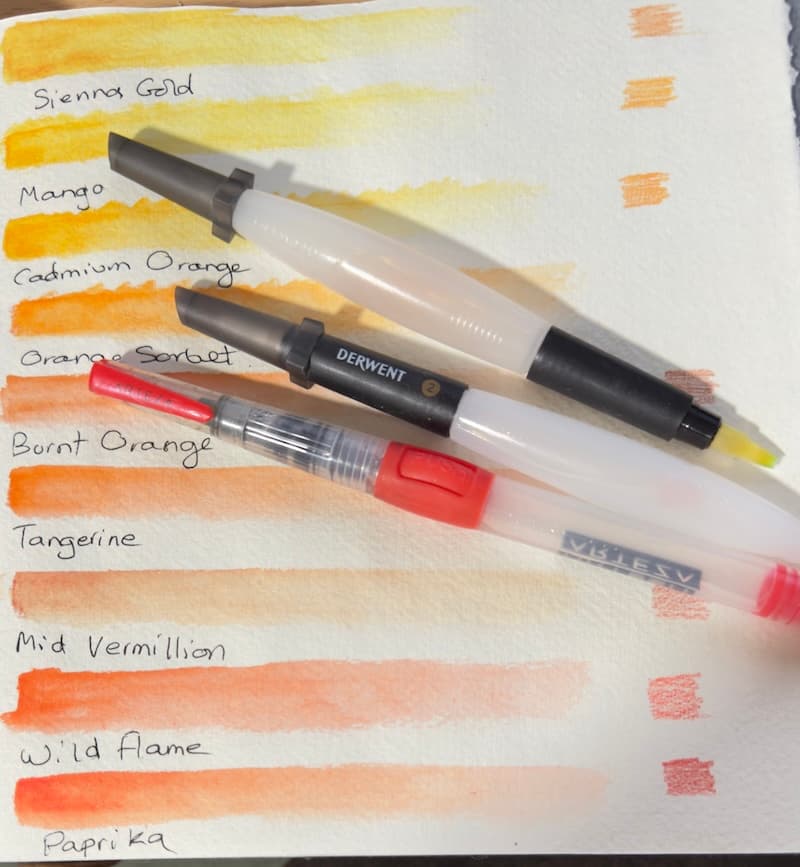
My water brush collection
Tips for Using Brushes with Inktense
- Control your water flow. Too much water spreads the pigment uncontrollably; too little leaves it only partly activated. Practise on a scrap of paper to find the right balance.
- Clean your brushes often. To avoid muddy colours, rinse regularly, or squeeze clean water through a water brush to clear residual pigment.
- Blot excess water. If you have applied too much, gently blot with a paper towel or cloth to regain control.
- Combine brush types. Use a water brush for initial washes when sketching outdoors, then switch to round or detail brushes for controlled work back in the studio.
The Benefits of Mixing on a Palette
Mixing Derwent Inktense pencils on a palette gives you far more control over colour intensity and subtle variation, especially for soft washes and custom colours.
- Control intensity. Adjust the strength or dilution before the colour touches the paper. Perfect for the soft, pale hues that are hard to get by applying the pencil directly.
- Create custom colours. Mix two or more Inktense colours into entirely new shades, expanding your palette without buying more pencils.
- Smooth application. Pre-mixing gives smoother, more even washes and avoids harsh pencil marks or streakiness.
- Layering flexibility. Controlling the intensity lets you build subtle layers gradually, ideal for the nuanced tones of landscapes and animals.

Mixing Sherbet Lemon and Amethyst on a Caran d'Ache palette
How to Use a Palette
You will need:
- Derwent Inktense pencils (you can also use Inktense blocks)
- A water brush, or a round brush and a water container
- A palette: a plastic palette, a ceramic dish, or even a scrap of textured watercolour paper. I treated myself to a Caran d'Ache palette recently, which has a slightly textured side that is ideal for Inktense.
Lightly scribble the tip of your Inktense pencil onto the palette. Do not press hard; a small amount is all you need to start. Place several colours side by side if you plan to mix them.
Dip your brush in clean water and touch it to the pigment. Swirl gently until it dissolves into a puddle of ink. More water gives softer, lighter washes; less water gives more vibrant, saturated colour. Inktense pencils do not have to be intense.
A colour mixed and lifted straight from the palette
Want to blend two colours? Dissolve each pigment separately, then bring them together on the palette with your brush. For example, mix Iris Blue and Sun Yellow for soft greens, or Cadmium Yellow and Lagoon for darker, more realistic greens.
Once you are happy with the colour, brush it onto your paper. This gives you real control, much like traditional watercolour. Start with light washes and build up gradually for more depth.
Mixing greens for landscape work
Ready to Explore a Whole New Layer of Creativity?
If you have been eyeing that tin of Inktense pencils with suspicion, or just avoiding them because you think they are too intense, it might be time to give them a whirl.
Yes, they are called Inktense for a reason, but with a splash of water and a bit of patience you can tame those colours into subtle, natural tones perfect for landscapes or wildlife. They are more versatile than they look, and you might just wonder why you did not try them sooner. So go on, dig them out and have a play.
Where to go next
For the wider range of wet-pencil techniques and tutorials, head to the watercolour pencils hub. And to see how Inktense sits among the rest of the Derwent line-up, my guide to the Derwent ranges compares them all.
Copyright © 2009- pencil-topics.co.uk All rights reserved
Home | About Us | Contact Us | Privacy Policy