- Home
- Watercolour pencils
- Watercolour brushes
Choosing Watercolour Brushes for Watercolour Pencils
I hold my breath. I can just see the watercolour pencil sketch on my paper. I pick up a brush and stroke the pigment, expecting it to activate and flow. But nothing happens. I try a different brush and this time the work is instantly flooded and colour runs everywhere.
I toss the brushes over to my left without looking. They land in the plastic box labelled Rejects.
I plunge my hand into the box, rolling the brushes through my fingers. That beautiful sable was too floppy to pick up the pigment. This one acts like a sponge, soaking up water then dumping it all at once.
What I’m looking for is a brush that is firm enough, without being too thirsty.

Different Brush Shapes
I sighed. I couldn't afford to keep testing and rejecting like this. What was I missing?
I pulled out a handful of brushes to study closer. Did they have anything in common? The handles did, but I discounted that as it was the working end of the brush I was interested in. I noticed that some were flatter but most were round like a pencil.
I swiped the brushes over the back of my hand. I loved the smooth tickle of the sables, but I had already put them aside for watercolour paint only.
Next I picked up the brushes with long sweeping bristles. Rougher to the touch, prickly. They had the word Oil on the barrel.
I moved on to the unused brush set I was given as a present. These were smooth but I had to press more firmly on my hand to get them to splay out as they seemed to have more spring. For acrylics, it said on the box.
Did the medium they were designed for matter?
I had nothing to lose so I slipped the acrylic brushes out of the box to try.
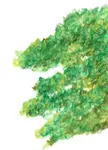
After scribbling in my sketchbook I dipped the round brush in water and pressed it onto the paper, wiggled it about to activate the colour and drew it across. The colour dissolved and followed the brushes path like an obedient puppy on a lead.
I picked up the other brushes from the box. All the same synthetic material, just the shapes and sizes differed. I could see a use for the large square flat headed brush, that seemed ideal for sweeping washes.
Intrigued, I tested that assumption by shaving some pencil pigment into a palette then mixing in some water. After dipping the brush into this puddle I tilted my paper and pulled the loaded brush along the top edge. Yup I'd get some use out of that. It’s a keeper.
 demonstrating their use for even washes and clean edges.") A selection of different sized flat brushes
A selection of different sized flat brushesAnother brush was flat but had a semicircle edge. I later learned this was called a filbert. Might be useful for blending perhaps?
 I found filbert brushes could create petal shapes.
Then the weird brush that looked like it had been electrocuted. Dipping that in the remains of the puddle, I dragged it across the paper. Hmm, maybe useful for wood grain or other textures? A nice to have, but not really necessary.
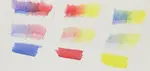
 I tested dabbing the brush onto the page after dipping it in different coloured puddles.
The last brush in the box had an extraordinarily long set of bristles! I tried three strokes and put it aside. I loved a long sharp point on a pencil, but on a brush?
A simple beginner brush kit
Eventually I realised that I was used to working with a fine pencil tip, and was naturally trying to reproduce that with a detail brush, which didn’t have the oomph to move the pigment.
I settled on a medium round synthetic brush. I found it had enough body to cope with the scrubbing motion that picked up the pigment without dumping too much water.
I'd suggest starting with a size 6-8 which will cover most watercolour pencil projects.
For large sweeping washes of sky or background, you might want to add a size 12.
For detail work, I'd suggest not going smaller than a size 4, or else you could end up with your own Rejects box.
When you finish a session, taking your brush out of the water pot and letting it dry flat can prevent brushes with a permanent cow lick.
The waterbrush

I came across the waterbrush in a tin of watercolour paints passed on to me by a neighbour.
Curious I tried it out. It took a little practice to get the squeeze right.
Like before, I found all waterbrushes were not the same. The plastic used for the water reservoir varied. Some brands were soft and even a gentle touch could be too much pressure. Others needed a firm squeeze to pass the water through to the brush.
Personally I prefer a proper round brush, but I have discovered two situations where the waterbrush comes out on top.
First when I have the laptop on my desk, and don't want to risk tipping over a water tub. And also when sketching outdoors, when I now carry a few watercolour pencils and the brush, filled from the tap at home.
Where would you like to go next?
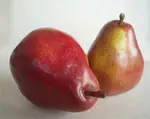
If you are new to watercolour pencils I created a simple tutorial where we walk through painting a pair of pears.
Want to practice the basics first? You'll pick up plenty of tips and techniques from the how to use watercolour pencils page.
For all my pages on this medium head back to the watercolour pencils hub.

I'm Carol Leather, a coloured pencil artist for over 15 years. Most of my teaching comes back to the same idea: realistic coloured pencil starts with structure, light and observation long before the colour goes down.
My work has featured in Ann Kullberg's Color Magazine, CP Magic and Color Pencil Treasures (vol 7). I'm a member of the UKCPS and was a prize winner in the Nature section of their Annual Open Exhibition in 2020.
You might like these
Watercolour Pencil Techniques | Beginner Guides & Tutorials
New to watercolour pencils? Start here with beginner guides, tutorials, and practical tips to build confidence and explore this versatile medium.
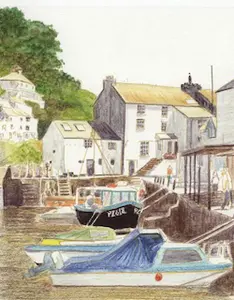
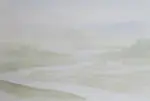
Watercolour Pencil Background Study & Lessons | Pencil Topics
Learn to paint atmospheric watercolour pencil backgrounds. A unique process study covering technique, composition, and learning from artistic challenges.
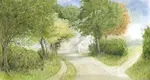
Learn watercolour pencil underpainting from Peter Weatherill
Discover Peter Weatherill's technique for using watercolour pencil underpainting to create a vibrant country lane. Learn how to add depth to your art
Copyright © 2009- pencil-topics.co.uk All rights reserved
Home | About Us | Contact Us | Privacy Policy