- Home
- Resources Hub
- Wax vs oil
Wax vs. Oil-Based Coloured Pencils:
Which One is Right for You?
Have you ever spent hours layering a rose petal, only for it to look muddy and streaky? Or struggled to draw the fine detail of an eye because your pencil point keeps crumbling?
I’ve been there. Often, the frustration isn’t your technique—it’s simply using the wrong type of pencil for the job.
The secret lies in the binder. Some pencils glide like butter (perfect for soft blending), while others hold a razor-sharp point (essential for intricate detail). Understanding the difference between wax-based and oil-based pencils is the quickest way to move from a frustrating struggle to confident creation.
In this guide, I’ll share behind-the-scenes secrets I’ve learned from manufacturers like Caran d’Ache to help you match the right pencil to your goals—whether that’s a smooth portrait background or every fine whisker on a pet's face.
Let’s start with a peek inside the pencil to see why they behave the way they do...
The Making of a Coloured Pencil
Every pencil is a recipe of three ingredients: Pigments for color, Binders (wax or oil) to hold it together, and Fillers for strength. The "feel" of a pencil depends entirely on how the manufacturer mixes these.
To illustrate this, Caran d’Ache spoke to Peter Weatherill about the different ways they create two of their most famous pencils:
1. The Wax-Based "Soaking" Process (Pablo)
In this method, the leads are made first and then soaked in wax. This results in a lead with a medium hardness that resists "wax bloom."
The process is what we call the non direct process. Leads are made of powders (pigments, of course, talcum and clay) and binders (always 2 kind of binders - gums). The leads are first extruded, dried for 8 hours and then soaked in molten waxes for 24 hours (like chips).
This is the non direct way to impregnate the leads with wax. In this case, the content of waxes is less than 10% of the total weight of the lead.
The low level of wax in the final pencil means that there will be a medium hardness in the 'touch' as the pencil is applied to the paper. A further benefit is that this will be unlikely to produce a wax bloom in the final artwork.
2. The Oil-Based "Direct" Process (Luminance)
Here, the waxes and oils are mixed directly into the lead "dough" before it is shaped. This creates a much softer, more buttery feel.
LUMINANCE is a mainly oil based and direct pencil. Leads are made of powders, waxes, and hydrogenated oil (solid, not liquid), and natural organic binder (gum). The leads are first extruded, then dried during 8 hours and then stay in stock during 2 months before being used to make the pencils.
Direct, in this case, mean that the waxes (and oil) are directly incorporate in the recipe. Leads are not soaked. In this case, the content of waxes is less than 30% of the total weight of the lead.
The higher percentage of waxes and oils gives the softer feel to the pencils, the higher oil content gives the protection against blooming.
If one manufacturer can create such different pencils, how do you choose the right one for your style? Here is the framework I use to match the pencil to the goal.
Which Pencil Type Matches Your Goals?
Most coloured pencils contain both waxes and oils in varying proportions. So my advice is to treat wax vs oil as a performance spectrum.
Some ‘oil-based’ favourites still contain wax - what matters is performance (point, layering, bloom tendency), not the label.
If your goal is...
Choose Wax-Based
Choose Oil-Based
The Visual Result
Soft, painterly and dreamy
Crisp, sharp and highly detailed
Best Subjects
Portraits, soft skin, and skies
Animal fur, botanicals, and architecture.
Core Strength
Fast color buildup and "buttery" blending.
Holding a sharp point and endless layering.
The "Feel"
Glides effortlessly across the paper.
Offers more resistance and control.
Point Retention
Softer; needs frequent sharpening for detail
Harder; holds a razor-sharp point for longer
Solves This Problem
My colors look streaky or my paper feels scratchy
My details are fuzzy or my points keep crumbling.
The Artist's Secret: You don’t have to choose just one. Many successful pieces use Oil-based pencils for the "sharp" focal points (like eyes and whiskers) and Wax-based pencils for soft, blended backgrounds.
The Supporting Cast: 3 Factors That Change Everything
A pencil doesn't work in a vacuum. To get the best results, you need to match your pencil type to your paper, your sharpener, and your blending style.
1. The Surface (Paper Tooth)
Smooth (Hot Press) Paper: Best for Oil-based pencils. The smooth surface allows for the extreme detail and sharp lines these pencils excel at.
Textured (Cold Press) Paper: Best for Wax-based pencils. The "valleys" in the paper grain hold onto the soft wax, allowing for deep, rich color buildup.
2. The Sharpener Choice
Handheld Sharpeners: Great for tough Oil-based cores (like Polychromos), but can snap the "buttery" cores of wax pencils.
Crank (Helical) Sharpeners: A must-have for Wax-based pencils (especially Prismacolor). They pull the pencil into the blade evenly, preventing the core from twisting and snapping inside the wood.
3. The Blending Method
Solvents (Zest-it/Mineral Spirits): Work beautifully with both types of pencils to break down the binder and create a "painted" look.
Burnishing & Dry Blending: An effective way to blend both types of pencils. Use heavy pressure or a colorless blender to "mash" wax layers together.
Best Wax & Oil Coloured Pencils In The UK
Not all "artist" pencils are created equal. Cheaper sets often use more fillers (like chalk) and less pigment, leading to dull, scratchy results. Here are the best options you’ll actually find in UK shops:
Options Marketed as Being Wax-Based (Smooth and Blendable)
Derwent Coloursoft
- The Lowdown: Made in the Lake District; incredibly soft and easy to blend without the "import tax" of US brands.
- Best for: Soft portraits and gentle backgrounds.
- Where to buy: Widely available at Hobbycraft, Amazon UK, and local shops
Prismacolor Premier
- The Lowdown: The "gold standard" for buttery application, but can be brittle and expensive in the UK due to shipping.
- Best for: When you want that "melts like butter" feel for large areas.
- Where to Buy: Jackson’s Art or Cult Pens (rarely found in high street shops)
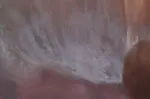
The "Cloudy Film" Mystery: Wax Bloom
1. Diagnose: Is it Bloom?
You’ll see a cloudy, white or greyish film appearing over your work. It typically strikes your darkest areas where you have used heavy pressure and many layers. Changes in temperature or humidity usually trigger it.
2. Remove: The Instant Fix
Don't panic—it hasn't ruined your art. Take a clean, soft cloth or dry tissue and very gently buff the surface of the paper. The cloudiness will disappear, and your vibrant colors will return instantly.
3. Prevent: Stop it Returning
Layer Lighter: Avoid "smashing" the paper tooth with heavy pressure until the very final stages of your drawing.
Seal the Work: Once finished, apply a light coat of artist fixative. This creates a barrier that keeps the wax trapped beneath the surface.
Go Oil-Based: If you live in a very humid climate, oil-based pencils are your best defense, as they are virtually immune to blooming.
Need a step-by-step fix? Read the full guide: How to Fix and Prevent Wax Bloom →
Options Marketed as being Oil-Based
Many pencils having oil-based binders are reported to reduce the wax bloom risk; exact recipes vary by brand. Personally I have never had a problem with Polychromos pencils.
Faber-Castell Polychromos
- The Lowdown: The ultimate "workhorse". They are firm and hold a sharp point for a long time.
- Best For: Realistic animal fur, whiskers, and botanical details.
- Where to Buy: Everywhere - from high-street art shops to Hobbycraft.
Caran d'Ache Luminance
- The Lowdown: The "Rolls Royce" of pencils. Although they contain a small percentage of wax as well as oil they tend to have more protection against blooming than other brands. Their industry-leading lightfastness is a bonus.
- Best For: Professional-grade work intended for sale, where long-term stability is vital.
- Where to Buy: Specialist retailers like Jackson’s or Pegasus Art.
Derwent Lightfast
- The Lowdown: The UK’s premium answer to Luminance. A stable, oil-based core that is much less likely to develop a cloudy film, made right here in the UK.
- Best For: British artists wanting museum-quality lightfastness without the import premiums.
- Where to Buy: Direct from Derwent, specialist retailers like Jackson’s or Cult Pens.
The Budget Reality Check: You can produce museum-quality art with mid-range pencils like Derwent Coloursoft or Polychromos. Don't feel pressured to buy the most expensive set until your skills actually demand them.
My starter recommendation for UK artists:
If you’re just beginning your journey, don't buy a massive, expensive set of one brand. Instead, "build your own" versatile kit:
The Power Duo: Get a 24-set of Derwent Coloursoft (for smooth blending) and a 24-set of Faber-Castell Polychromos (for crisp details).
This combination costs less than a single premium set, is easily available in most UK art shops, and gives you the perfect tools to master both wax and oil techniques simultaneously.
Blending & Layering Workflows (Wax Vs Oil)
Choosing the right pencil is only half the battle. Here are the "cheat sheets" I use to get the most out of each type:
🕯️ Recipe A: Smooth Wax Blending (Without the Mud)
Best for: Derwent Coloursoft or Prismacolor
- Value Map: Start with a base layer using very light pressure.
- Glaze: Build color with 2–4 light layers in one direction.
- Layer, Don't Press: Build depth through layering, not by pressing harder.
- Burnish Last: Only use heavy pressure (burnishing) on your final color layer.
🛢️ Recipe B: Crisp Oil Detail Workflow
Best for: Faber-Castell Polychromos or Derwent Lightfast
- Sharp Outline: Use a needle-sharp point and a light hand for your initial sketch.
- Build Midtones: Apply color in 3–6 extremely light passes to keep the paper texture open.
- Reinforce Edges: Use short, directional strokes (following the direction of fur or hair).
- Shadows Last: Deepen your darkest areas last to keep your colors from overmixing.
- The Fatigue Check: Take a short break before the final details; hand fatigue leads to accidental heavy pressure.
🤝 Recipe C: The "Best of Both" Strategy
The Pro Approach: Using Wax and Oil together
- Oil First: Use oil-based pencils for focal points, sharp edges, and fine textures.
- Wax Second: Use wax-based pencils for soft background gradients and smooth transitions.
- The Golden Rule: Always do your detail work with oil first. If you put wax down first, it’s very difficult to get a sharp oil-based point to "grip" on top of that slippery wax layer.
These recipes give you the roadmap, but there is one more thing you need to know before you invest in your next set of pencils...
Will Better Pencils Transform Your Art?
With so many great options available in the UK, it’s tempting to jump straight to the most expensive "professional" set. But I learned the hard way that they aren't a magic fix.
Years ago, I invested over £200 in a set of Luminance pencils, convinced they would finally make my art look professional. Instead, the rich pigments only made my shaky proportions and muddy color mixing more obvious.
The truth is, pencils amplify your skill level - they don’t create it.
A skilled artist can create stunning work with £2 budget pencils, while the most expensive set in the world won't rescue poor technique. The real investment that matters most isn't the wood and wax in your hand; it's the time you spend mastering the fundamentals.
How do you know when you're actually ready to upgrade?
Don't do it because you're frustrated; do it when you have a specific technical need. You're ready for premium pencils when:
- You need the highest lightfastness for work you intend to sell.
- Your current pencils physically cannot layer any further without "greasiness" or breaking the paper tooth.
- You’ve mastered colour mixing and need more complex pigments for subtle skin tones.
The real investment that matters most isn't the wood and wax in your hand; it's the time you spend mastering pressure control, value, and color relationships.
Your Next Steps: From Understanding to Creating
Now that you know how to choose your tools, let’s focus on the skills that actually bring your art to life. Whether you’re using budget pencils or a professional set, here is how to move forward:
- The 5-Minute Comparison Test: Draw the same simple subject (like a leaf or an apple) twice - once with a wax-based pencil and once with an oil-based one. Pay attention to how the color builds and which one feels more natural for your style.
- Master Pressure Control : Learn how the weight of your hand creates everything from soft gradients to deep, rich shadows.
- Develop an Eye for Value: Learn how to see light and dark accurately so your drawings look three-dimensional rather than flat and lifeless.
- Master Smooth Blending Techniques – Learn how to create soft gradients without "pencil lines."
- Understand Colour Layering: The key to vibrant colors without your work turning "muddy."
- Learn Colour Mixing on Paper – How to create hundreds of shades from just a few pencils.
- Try Your First Realistic Project: Put it all together by tackling a simple texture or a beginner-friendly animal portrait.
The real magic doesn't come from what’s inside the pencil - it comes from the confidence you build through practice.
If you're still feeling unsure about which brands to invest in first, my free guide can help you clarify your priorities before you shop:
"6 Questions to Ask Yourself When Choosing Coloured Pencils"
Got a specific challenge you're stuck on? Drop me a line! I read every email and love turning your questions into new tutorials for our community.
You might like these
Essential Accessories for Coloured Pencil Artists
Beyond pencils and paper, what tools do coloured pencil artists actually use? See my essential accessories including erasers, blenders, sharpeners and more.
Lightfastness Explained: Preserve Your Coloured Pencil Art
Worried about your coloured pencil art fading? Learn all about lightfastness ratings (ASTM, Blue Wool) & how to select pencils that keep your artwork beautiful
Coloured Pencil Wax Bloom: Causes, Fixes & Prevention | Pencil Topics
Don't let wax bloom spoil your coloured pencil art! Our guide explains its causes, easy fixes, prevention tips & how to use artist fixatives safely.
Improve Your Pencil Art: Get Free Tips & Techniques
Sign up for our newsletter – just occasional emails packed with practical advice and inspiration for pencil artists like yourself
Copyright © 2009- pencil-topics.co.uk All rights reserved
Home | About Us | Contact Us | Privacy Policy