- Home
- Landscape Composition Painting
From Reference to Reality - Part 1: Composition, Planning and Preparation
Welcome! Are you ready to explore how a captivating canal scene comes to life using a beautiful combination of watercolour pencils and dry coloured pencils?
Over this special three-part series, we're going to journey together from an initial idea – inspired by real-life reference photos – right through to a richly detailed finished artwork.
We'll be taking an in-depth look at an artist's process, breaking down each stage so you can learn the techniques and apply them to your own landscape paintings.
In this Page 1: Composition, Planning & Preparation, we'll dive into the absolutely crucial first steps that lay the groundwork for a successful painting. We'll explore:
- How to critically analyse your reference photos and identify potential focal points
- Smart ways to adjust and improve a composition to create a more engaging and balanced scene – including how artistic license can be a powerful tool for achieving your unique vision.
- Gathering the essential palette and tools you’ll need for the entire journey ahead, ensuring you’re perfectly prepared before you even touch pencil to paper.
Getting these foundational elements thoughtfully considered and organised is so important for a smooth and enjoyable painting experience. So, let's get started on our journey from reference to reality!
Stage 1: The Artist's Eye -Analysing the Scene and Compositional Choices

Peter Weatherill observes:
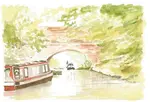
Look closely now. Study the photo above. Possible focal points could be... The arched bridge over the canal, half hidden by trees? The narrow boat heading for the gap? The sun filtering through the foliage and forming highlights on the water? The bright “sky holes” in between the branches?
My notes
Peter brings up some interesting possibilities for a focal point here! When we talk about a focal point, it’s essentially what you see and focus on first when you sweep your eyes across the scene.
It’s not always the main subject, but rather an area that really grabs your attention.
In this first photo, notice how that strong contrast of light under the bridge immediately pulls your eye in?
That's a classic example of how high contrast can create a powerful focal point, almost not wanting to let your gaze go.
It’s only after a moment that you might spot the narrow boat – that little smudge of red is another contender because it stands out so clearly against all those greens.
However, a composition is a delicate balance.
My eye is also drawn to that bright white area on the far left. In a painting, we'd want to be careful with something like that, as it can unintentionally pull the viewer's eye right out of the picture, which isn't ideal.
Similarly, that light sky hole above the bridge catches your attention because of the light-against-dark contrast, but then there’s nothing truly of interest there, which can leave the viewer feeling a bit disappointed.
The dark trees on the right do a good job of acting as a 'visual stop,' keeping your eyes within the central area of the scene.
But see how they aren't quite balanced by something of similar visual weight on the left?
This can cause your eye to wander a bit, though thankfully, I also notice that dark line of rocks in the foreground which cleverly helps to lead your eye back towards the narrow boat.
So, as Peter rightly suggests below, the composition is almost there, but it could certainly benefit from a little thoughtful adjustment to strengthen that main point of interest and create a more harmonious viewing experience.
The focal point in this scene is crucial. However, the current composition is not quite working. To improve it, you could consider adding another boat closer to the viewer.
My notes
Peter’s right, that original scene has a lot of potential, but it needs a little something more to really draw us in.
There's a hint of colour contrast in the bridge photo with that little red boat against the green, but it’s quite subtle. It doesn’t quite 'pop' in a way that immediately grabs your attention; you almost have to search for it.
That classic combination of complementary colours – red and green – is certainly something we could choose to emphasize in our painting to create more visual impact.
But, for me, the main challenge in this initial photo is that lack of balance between the left and right sides. When a composition feels unbalanced like this, it can almost hide the intended focal point.
Your eye might spot the interesting area (like the boat under the bridge) for a moment, but then it can easily drift off, perhaps out of the left-hand side of the picture here.
That’s not ideal if we want to keep our viewer engaged with the main story of our artwork!
So, as Peter points out, introducing another boat could be a clever way to address both these issues – strengthening the colour interest and improving the overall balance.
Now, in an ideal world, he might have waited patiently by the canal all day, but as you can imagine, the chances of another perfectly placed boat appearing just when needed were pretty remote! And by then, the original narrow boat might have been long gone.
This is where artistic license becomes such a valuable and empowering tool for us.
It means we don’t have to be limited by a single photograph.
We can absolutely decide to look elsewhere for elements – like another boat from a different photo – that will help us create the stronger, more compelling composition we're aiming for.
It’s all part of turning that initial reference into the reality we envision!
Improving the composition
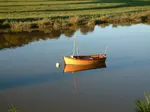
We have another photo that will work wonderfully. This boat has another splash of red, a dark shadow. It also offers a contrast in size which adds depth and perspective to our composition. Objects appear larger and more detailed when close to us. But as the distance increase they seem smaller and less distinct. This phenomenon serves as a reminder that appearances can be deceiving.

My notes
It seems Peter's fondness for narrow boats came in handy here, and it’s wonderful when you find just the right image in your photo collection to solve a compositional puzzle!
This is a perfect example of how using elements from multiple reference photos can be incredibly powerful.
As artists, we're not confined to a single snapshot; we can absolutely combine the best bits from different sources to create the scene we really want as I highlighted in my page on Using Photo References for Drawing.
So, why does this particular second boat work so well for Peter’s canal scene? Let’s break it down:
- Enhanced Colour Contrast: You’ll notice this boat brings in more of that lovely red colour. As I mentioned earlier, the original photo hinted at a red/green complementary colour scheme, and this new boat really helps to strengthen that, adding a much more definite splash of warmth and visual interest against the predominantly green foliage.
- Helpful Angle and Form: The angle of this boat is a great fit, as Peter notes, echoing the line of the canal bank. This helps it sit naturally within the scene. (And it's a good reminder that even if an element in another photo isn't perfectly angled, simple software can often flip or adjust an image to suit our needs).
- The shading on the boat, with that greenish colour cast from the overhanging willows, also helps it integrate beautifully with the light and atmosphere of the area leading up to the bridge.
- A Critical Eye (Even with Good Elements!): Now, looking closely, that very bright white section on the end of the new boat nearest to us does catch my eye. It feels a little stark, especially if the main light source is coming from beyond the bridge. It makes me wonder if Peter will tone that down or adjust it as the painting progresses – it's just the sort of detail an artist often refines along the way!
- The Power of Size and Placement: This is perhaps the most crucial aspect. By deciding to place this new boat closer to the viewer, it will naturally appear larger. As Peter mentions, objects closer to us appear bigger and more detailed, and this contrast in size between the closer boat and the one further away under the bridge will significantly enhance the sense of depth and perspective in the painting.
- Solving the Balance: Critically, this larger, closer boat acts as a significant 'visual weight'. It effectively blocks the viewer's eye from drifting off the left-hand side of the picture, which was the main issue we spotted with the original composition. It helps to anchor that side of the painting and guide the eye back into the scene, towards the bridge and the boat beyond.
By thoughtfully selecting and integrating this second boat, Peter is setting himself up to create a much more balanced, engaging, and three-dimensional painting.
It’s a fantastic demonstration of how a bit of creative problem-solving with your references can make all the difference!
Objects appear larger and more detailed when close to us. But as the distance increase they seem smaller and less distinct. This phenomenon serves as a reminder that appearances can be deceiving

My notes
Peter’s final point here is absolutely crucial for any artist wanting to create believable scenes.
Recreating a three-dimensional world on a flat piece of paper relies on certain skills and visual 'tricks' that become more intuitive with practice.
When you’re working very close up on a piece, elements like perspective or relative size can sometimes look a bit exaggerated or even strange. But then, when you step back and take in the whole picture, those very same elements suddenly click into place and make perfect visual sense.
We know instinctively that both boats in this canal scene are probably a similar physical size.
However, Peter's decision to render the boat intended for the foreground so much larger and with more potential for detail than the one further away under the bridge, effectively creates that essential sense of depth and pulls our eye into the scene.
This is a fundamental principle of perspective in drawing, and it’s one of the main ways we, as artists, convince the viewer that they're looking into a scene, not just at a flat surface.
It's all about guiding the viewer's perception! Understanding how to consciously use size, placement, and detail is a real cornerstone of creating engaging and realistic landscapes. If you'd like to explore these foundational ideas further, my guide to basic perspective drawing offers some great starting points.
Stage 2: Gathering Your Palette and Tools for the Journey
Peter starts by mentioning the paper he will use:
In order to create an underpainting with watercolour pencils, it is necessary to use a high-quality watercolour paper. For the artwork showcased on this page, Fabriano 5 was carefully selected. However, you can choose any hot pressed paper that possesses the necessary tooth to accommodate the dry pencil that will be added in the later stages of this drawing.
My notes
I wholeheartedly agree with Peter here – using a good watercolour paper if you're planning to introduce any wet techniques is a very wise move indeed!
Basic cartridge paper, the kind you might use for dry sketching, will often buckle and warp when water is applied, and it can struggle to lay flat again once it dries.
Worse still, it could even start to break down or disintegrate if you apply too much pressure with a wet brush when activating your watercolour pencil pigment, which is no fun at all!
Like Peter, I also have a fondness for Italian papers, and my personal favourite is often Fabriano Artistico, in their 'Traditional White' which is a lovely, slightly creamy colour.
Peter mentions using 'Fabriano 5' for this piece, and the key thing he points out is choosing a hot pressed paper.
As the name suggests, hot pressed paper is smoother than 'NOT' paper (which amusingly stands for 'Not hot pressed' – very original, I know!).
This smoother surface is generally excellent for the kind of detailed work we often aim for with coloured pencils. Importantly though, it still has plenty of tooth – that slight texture – to grab onto your pencil pigment, both for the initial watercolour pencil underpainting and for all those lovely dry coloured pencil layers you'll be adding later on.
For a more in-depth look at different paper types and how to choose what’s best for your coloured pencil work, you can find more information in my guide to Best Paper for Coloured Pencils.
And here's a personal tip: even when I'm using a quality watercolour paper, if I'm planning on applying noticeable washes, I still prefer to stretch it on a board.
This extra step really helps to ensure it dries perfectly flat and gives you the best possible surface to work on. If you're new to stretching paper, don't worry, I cover it step-by-step in my guide to Stretching Watercolour Paper.
When it comes to pencils, two renowned brands, Faber Castell and Caran d'Ache, offer both coloured and watercolour pencils in the same colour range. Both of these options offer a wide range of vibrant hues and would be suitable for your drawing.
My notes
The two manufacturers that Peter mentions above happen to also be my favourites!
I especially love that their watercolour pencils pair perfectly with their dry coloured pencil ranges.
My Polychromos and Albrecht Dürer pencils from Faber-Castell are my go-tos, followed closely by the Pablo and Supracolor ranges from Caran d’Ache.
This makes it super easy to transition to the same hues when the underpainting stage is completed, ensuring harmonious colour and a really professional-looking finish to your artwork.
If you want to explore the different pencils available in more detail, you might like to check out my guide to Choosing Coloured Pencil Brands.
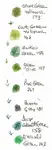
The palette consisted of the following array of shades, carefully chosen to capture the picturesque canal scene. Grass green, Yellow Ochre, Burnt Sienna, and Paynes Grey.
My notes
Peter's chosen palette of just four colours might indeed surprise you!
You might be thinking, "Where’s a bright red, for details on the boat, or a black for the very darkest shadows?
Well, the great thing about watercolour pencils is their fantastic mixing capability.
Working with a limited palette like this, especially for the underpainting of natural scenes, has a real advantage: it helps ensure all your colours sit together harmoniously, and nothing suddenly jars the eye.
It also encourages you to become more inventive with your colour mixing, which is a brilliant skill to develop!
For the main landscape elements in this canal scene's underpainting, these four shades are surprisingly versatile:
- Paynes Grey is a wonderful alternative to black for creating a whole range of darks and shadows. It tends to look less 'flat' than a pure black and can be mixed with Burnt Sienna for rich, dark browns, or with your Grass Green for deep, shadowy foliage.
- The Grass Green and Yellow Ochre will, of course, give you a lovely variety of natural greens when used together or individually – from brighter, sunlit hues to more muted, earthy tones.
- And Burnt Sienna is such a useful warm earth colour, perfect for touches on banks, tree trunks, or for warming up your greens to make them look even more natural.
So, for establishing the overall atmosphere and base colours of the landscape, this selection works beautifully. Any specific, vibrant accent colours (like the red Peter wanted for the narrow boat) would typically be added later with dry coloured pencils or a specific watercolour pencil when focusing on that particular element, ensuring the main scene retains its natural harmony.
It's amazing what you can achieve with just a few carefully chosen colours!
If you'd like to explore this concept further and see how to get the most out of a restricted selection, I have a specific exercise you might enjoy right here on the site: my guide to Working with a Limited Colour Palette.
For the underpainting you will also need a plastic or porcelain dish. a sharp craft knife and a paintbrush.

My notes
It can be tempting to visit an art shop and buy all sorts of special palettes, but as Peter suggests, all that’s really needed for mixing your watercolour pencil washes is a plain white plate, an old saucer, or an inexpensive plastic palette. Simple and effective!
Peter didn’t mention a water pot for rinsing your brush, but I always find it handy to have one. My tip is to choose something that’s wider than it is tall – it’s much less likely to get knocked over in the excitement of painting!
The reason for the craft knife will become clearer when Peter explains his method for preparing the watercolour pencil pigments in the next stage.
If you do choose to use one for this purpose, I absolutely want to emphasize that, counter-intuitive as it may sound, a sharp knife is generally safer than a blunt one as it requires less pressure and is less likely to slip.
However, please do be incredibly careful when handling any sharp blade – you certainly don’t want any unplanned red on your beautiful paper!
I go into more detail on safe knife handling on my page about sharpening pastel pencils with a knife.
And finally, Peter mentions a paintbrush. A couple of soft synthetic brushes will serve you well for activating your watercolour pencils and applying the washes. For more detailed advice, head over to my guide to Choosing Brushes for Watercolour Pencils.
And that brings us to the end of this first part of our 'From Reference to Reality' journey!
You've now seen how an artist like Peter approaches the critical initial stages of a painting: from carefully analysing reference photos and making thoughtful compositional decisions – with a little help from that powerful tool, artistic license! – to selecting the specific palette and tools needed for the artwork ahead.
These preparatory steps, covering your compositional planning and gathering your materials, are so vital. They lay a solid foundation, helping to ensure a smoother and more enjoyable painting process as you move forward.
Feeling inspired and ready to see how this thoughtful preparation translates into the first layers of beautiful colour? I hope so!
In Page 2: The Watercolour Pencil Underpainting, we’ll dive straight into Peter’s techniques for applying those initial washes, establishing textures with watercolour pencils, and creating a vibrant and harmonious base that will make the subsequent dry coloured pencil work truly shine.
You won't want to miss it!
Ready for the next step?
Stage 3: Laying the Foundation: The Watercolour Pencil Underpainting
Your first task is to draw out the image and transfer it to your paper.
My notes
Peter’s absolutely right that getting your main outline onto the paper is the first essential step before you even think about your paints or pencils.
For a landscape scene like this one, with its organic shapes and the lovely, slightly impressionistic feel we might be aiming for, I personally wouldn’t bother with a highly detailed tracing.
The key thing, as I see it, is to create a basic outline that simply lays out where the different elements – like the diagonal lines of the river bank, the lovely arched bridge, and the main shapes of the boats – are placed within your overall composition. You really don't need to draw every leaf or blade of grass at this stage!
I would, however, take a little more care with the details of the foreground boat, as that will naturally be a more prominent feature in the finished piece.
A really useful tip here, and one I often use myself, is to draw your initial outline using a lightly applied watercolour pencil in a relevant colour. A very pale grey, a light earthy tone that will blend in with your underpainting, or even a light blue for sky areas can work beautifully.
This is often much better than using a traditional graphite pencil, as graphite lines can sometimes look a bit stark or can muddy your delicate watercolour washes if they're too heavy.
A watercolour pencil outline, on the other hand, will usually just dissolve and blend beautifully into your painting as you add water.
Of course, if you're not yet comfortable drawing your scene directly onto your watercolour paper freehand from your reference, you can certainly use other methods to help you get the placement right.
You can find more information on these in my guide to How to Use Tracing Paper and my guide to The Pencil Drawing Grid Method.
The main goal at this point is simply to get a confident, light outline in place to guide your first washes.
Gently scrape the pigments from the pencil tips and collect them in separate wells. Add water to each well, to create delicate washes. The plan here is to use two thin washes of colour rather than one thicker one. Apply the washes with a flat watercolour brush leaving the sky and white areas on the boats and water as bare paper.

My notes
Starting with an underpainting of watercolour pencils is such a smart approach, just as Peter outlines.
It really helps you focus on the bigger picture of your artwork and can stop that common tendency to get too fussy with details right at the very beginning.
Plus, those initial washes cover the bare paper, filling in the little ‘valleys’ in the paper’s tooth which can sometimes be a nuisance later on if they show through as tiny white flecks.
It’s also a brilliant way to establish the main base colours in each area and, as Peter points out, it serves as a visual reminder of where those important white spaces should remain bare paper at this crucial stage.
I must admit, I share Peter's enthusiasm for preparing pigments by gently scraping them from the pencil tips!
There’s something strangely satisfying about watching that pigment blossom into a coloured puddle when you add a little water.
And from a practical standpoint, I know I’m not wasting any of that precious pencil core, nor am I risking getting water inside the wooden casing of the pencil itself, which can happen with some other methods of lifting colour.
You can explore this and other ways to lift pigment and prepare your washes in my guide to Watercolour Pencil Techniques.
Just as with traditional watercolour painting, I love that Peter emphasizes the benefit of applying multiple thin layers of colour rather than trying to achieve a deep enough value all in one go. This approach gives you so much more control over the intensity, helps prevent streaking, and builds up a lovely, luminous depth to your underpainting.
Using a flat brush, as Peter does, for these initial washes is also a good tip, especially for larger areas.
It can make the process of applying pigment to the paper quicker and certainly lessens the chance of one brushstroke drying out before you’ve reloaded your brush for the next, helping you achieve smoother, more even coverage.

Once the painting is dry, use the watercolour pencils dry to add texture and depth to the foliage, by scribbling with the pencil. Use smooth horizontal strokes for the water.
My notes
Don’t put your watercolour pencils away yet!
Peter’s next step is to use them in pencil form on top of the dry washes. Do be patient and wait until your paper is bone dry as any remaining dampness will draw the pigment out of the pencil and create a heavy line that you do not want!
This way of using the watercolour pencils shows how versatile they are. The dry textures (such as scribbles for the foliage and horizontal strokes for the water) will guide you when you come to do the final detailing with your choice of coloured pencils.
Add the base colours to the narrowboats, leaving the white areas free of pigment
My notes
Peter’s next instruction is to focus on the narrowboats themselves, and this is where we see a common and very effective artistic approach unfold.
You might recall that Peter's initial four-colour palette for the overall 'canal scene' (Grass Green, Yellow Ochre, Burnt Sienna, and Paynes Grey) didn't include a red.
And yet, as we can see in the image of the first washes, the boat clearly has its distinctive red colour established! This isn't a contradiction, but rather a smart way of working.
While that lovely limited palette is perfect for creating the harmonious greens, earth tones, and general atmosphere of the water and surrounding foliage, when it comes to a key feature like a brightly coloured narrowboat, an artist will often use the actual main local colour of that object for its own initial underpainting wash.
So, for the red parts of the boat, Peter has introduced a suitable red watercolour pencil and applied that as a light, even wash, just as he did with the other colours for the landscape elements.
This ensures the boat has a really vibrant and true foundation, ready for the more detailed dry coloured pencil work that will come later. It’s all about giving each part of the painting the best possible start.
The key, as Peter rightly emphasizes, is to continue leaving those white areas free of pigment on the boats. These will be your brightest highlights, perhaps where the sun is glinting off the paintwork or the cabin roof, and preserving the white of the paper here is crucial.
So, to sum up this stage: the limited palette helps to set the overall mood and foundation for the broader landscape, and then specific, important objects within that scene (like our narrowboats) often get their own true base colours established with watercolour pencil washes.
It’s a logical process of working from the general to the specific, ensuring each element is perfectly prepped for the detailed layers to come.
And that brings us to the end of this first page of our 'From Reference to Reality' journey!
You've now seen how an artist like Peter approaches the critical initial stages of a painting: from carefully analysing reference photos and making thoughtful compositional decisions – with a little help from that powerful tool, artistic license! – to selecting the specific palette and tools needed for the artwork ahead.
These preparatory steps, covering your compositional planning and gathering your materials, are so vital. They lay a solid foundation, helping to ensure a smoother and more enjoyable painting process as you move forward.
Feeling inspired and ready to see how this thoughtful preparation translates into the first layers of beautiful colour? I hope so!
In Part 2: The Watercolour Pencil Underpainting, we’ll dive straight into Peter’s techniques for applying those initial washes, establishing textures with watercolour pencils, and creating a vibrant and harmonious base that will make the subsequent dry coloured pencil work truly shine. You won't want to miss it!
Ready for the next step?
Continue to Page 2: The Watercolour Pencil Underpainting

I'm Carol Leather, a coloured pencil artist for over 15 years. Most of my teaching comes back to the same idea: realistic coloured pencil starts with structure, light and observation long before the colour goes down.
My work has featured in Ann Kullberg's Color Magazine, CP Magic and Color Pencil Treasures (vol 7). I'm a member of the UKCPS and was a prize winner in the Nature section of their Annual Open Exhibition in 2020.
You might like these
Watercolour Pencil Underpainting (Pt 2): Landscape Guide
Learn watercolour pencil underpainting for landscapes! Part 2 of our guide covers washes, textures & base colours for a coloured pencil art foundation
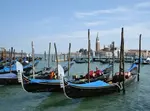
Creating a Venice Gondola Scene: An Artist's WIP & Tips
Follow artist Daryl Cogavin's process creating a Venice gondola scene in mixed media (ink, watercolour, coloured pencil). Insights & tips from a real project.
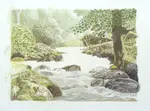
Drawing reflections in water with coloured pencils
Learn all about drawing reflections in water using coloured pencils | Your guide to discovering how they are affected by your viewpoint.
Copyright © 2009- pencil-topics.co.uk All rights reserved
Home | About Us | Contact Us | Privacy Policy