- Home
- Pastel paper
The Ultimate Guide to Choosing Pastel Paper for Artists
If you're venturing into the wonderful world of pastel pencils, or perhaps you've tried them and found yourself a little frustrated, you're in the right place.
One of the most critical factors for success and enjoyment with this beautiful medium is the paper you choose – something I learned the hard way!
I vividly remember my own early days with pastel pencils.
Full of enthusiasm, I picked up some commonly recommended Ingres paper, only to find my pencils squeaking, the beautiful pigment refusing to layer, and the paper's texture dominating my efforts.
It was so disheartening that I almost put my pastel pencils away for good!
It wasn't until I discovered surfaces more suited to the unique way pastel pencils lay down their colour that I truly began to appreciate what this medium could do.
That's why I've created this in-depth guide. I want to save you that initial frustration and help you find pastel papers that will make your learning journey a joy, not a battle.
We'll explore:
- Why paper choice is so crucial specifically for pastel pencils.
- The different types of pastel papers available, from traditional lighter sheets to modern coated and sanded surfaces.
- My own hands-on test results showing how various papers perform with both pastel pencils and traditional dry coloured pencils (like Polychromos).
- Practical pros, cons, and tips for each, so you can make informed choices.
My goal is to give you the knowledge and confidence to select papers that will truly bring out the best in your pastel pencil art.
Let's find your perfect paper partner!
Other Pastel Paper Pages
Understanding Pastel Paper Essentials (for Pastel Pencils)
Understanding Tooth and Texture
If you're exploring the wonderful world of pastel pencils, you'll quickly discover that the paper you choose plays a starring role.
Two words you'll hear a lot are 'tooth' and 'texture.'
These aren't just fancy art terms; they're the secret to how well your pastel pencils will grip the paper, how many luscious layers of colour you can build, and ultimately, how impressive your finished artwork will look and feel.
If you've used traditional coloured pencils, you already know paper is important, but with the softer, more powdery nature of pastel pencils, understanding tooth and texture becomes even more crucial.
Let's take a closer look at what these mean for your art.
What is 'Tooth'? The surface of your paper isn't perfectly smooth like glass. Instead, it has tiny, microscopic 'hills and valleys‘. That’s its tooth!
These little indentations are absolutely vital because they act like tiny fingers, grabbing the powdery pigment from your pastel pencil and giving it something to cling to.
Simply put: no tooth, no grip for your beautiful colours!
Papers with More Tooth
Papers described as having more tooth (you’ll often hear about sanded papers, or coated surfaces like my beloved Pastelmat) have a more distinct texture, though some can feel surprisingly fine or velvety to the touch!
The brilliant thing about these surfaces is their ability to grab and hold onto a lot of pigment.
This means you can apply many layers of pastel pencil, which is absolutely fantastic for creating those rich, deep colours and beautiful, complex blends that make pastel art so expressive.
The slight trade-off?
These more 'toothy' surfaces can be a little hungrier and wear down your pencil cores a bit more quickly, but for many artists (myself included!), the layering capability is well worth it.
Papers with Less Tooth
Then there are papers with less tooth. These include many traditional lighter-grained pastel papers (some Ingres papers fall into this category, as can smoother cartridge papers, though the latter are often not ideal for extensive pastel work).
These surfaces have a finer, shallower texture.
They are certainly gentler on your pencil leads, but the downside is they won't hold as many layers of pigment. Once those shallow 'valleys' are filled up, the paper can become slick, and you’ll find it increasingly difficult to add more colour effectively
Understanding 'Texture'
Now, 'texture' is closely related to tooth, but it often refers more to the visible and tactile quality of the paper's surface – what you can see and feel.
Some papers have a very regular, almost mechanical pattern. For instance, some traditional Ingres papers have fine ribbed lines.
This texture can become a very noticeable part of your drawing, which might be a lovely effect if you're after that, or a bit distracting if you want a smoother, more detailed finish.
(You’ll see in my review of the Daler Rowney Ingres paper how this texture really impacted the pastel pencil application for me).
Other papers might have a more random, organic texture, while some of the specialist surfaces offer a very fine, almost velvety feel (like certain velour papers, or the unique surface of Pastelmat). Sanded papers, as the name suggests, will have a noticeably gritty feel.
Why Does it Matter for Pastel Pencils?
So, why is all this fuss about tooth and texture particularly important when you’re using pastel pencils?
- Layering: Simply put, more tooth generally means more layers! This is a huge factor because those beautiful, rich, blended effects that many pastel pencil artists (including me!) absolutely adore rely on the ability to build up multiple layers of colour.
- Detail: If you love getting into the nitty-gritty details – and many of us who started with coloured pencils certainly do – the paper's texture plays a big role. A very coarse or visibly irregular texture can make it challenging to lay down very fine, crisp lines with a sharp pencil point. Often, a surface with a fine yet consistent tooth (even if it's a 'sanded' type paper) will allow for better detail.
- Blendability: The texture directly affects how easily your pastel pigments will blend. Some surfaces allow colours to meld together beautifully with just light pressure from your finger or a blending tool. Others, if the tooth is too shallow or too irregular for your specific technique, might resist blending or result in a patchy appearance.
- Pencil Consumption: As we've touched on, more abrasive textures will wear down your precious pastel pencils faster. It's a balance – you might use more pencil, but the results in terms of depth and vibrancy on these papers can be stunning.
My Personal Takeaway on Tooth and Texture
Please, don't be afraid of 'tooth'! When you first hear terms like 'sanded paper' or 'abrasive surface,' it might conjure up images of something harsh that will make your artwork look rough.
But I promise you, the right kind of tooth is your absolute best friend when it comes to building up those luscious, deep pastel pencil layers and achieving that vibrant, almost painterly quality.
Think of a paper with good tooth as a perfect dance partner for your pencils – it supports them, allows them to glide but also to grip, and helps them perform their very best!
It's far better to have a surface that takes the pastel easily than one you're fighting to get any richness on.
The ideal situation is finding a paper whose tooth and texture characteristics work in harmony with your artistic style, the subjects you love, and the level of detail you enjoy creating.
And that's exactly what I hope the detailed reviews in this guide will help you discover for yourself!
The Advantages of Coloured Pastel Paper
Beyond the texture and weight of your paper, the actual colour of the paper itself can make a difference when working with pastel pencils.
Far from just being a background, a coloured paper can become an active and exciting element in your artwork, helping you achieve depth, vibrancy, and a professional finish more easily.
If you've come from using mostly white paper with your dry coloured pencils, this is an area where pastel pencils really open up new possibilities!
Why Bother with Coloured Paper? More Than Just a Pretty Background!
You might be wondering if it's worth seeking out coloured surfaces. Based on my experience, the answer is a resounding yes! Here’s why:
- Instant Mid-Tone and Time Saver: One of the most practical benefits is that a coloured paper can provide an immediate mid-tone. This means you don't have to spend time meticulously covering every tiny speck of white, which can be quite laborious with pencils. The paper’s colour does some of the work for you, allowing you to build up your lights and darks more quickly and judge your values more accurately from the get-go.
- Enhanced Vibrancy and Depth: Pastel pencil colours can truly sing when placed on the right coloured ground. Light colours, for example, will appear much more luminous and impactful on a darker or mid-toned paper compared to stark white. Conversely, dark strokes can gain richness. This interaction can add an incredible sense of depth and vibrancy to your work.
- Unifying Your Artwork: The paper colour, even if only peeking through in small areas, can help to unify your entire piece. It creates a harmonious base that ties all the elements together. I’ve often found that those little flecks of paper colour showing through add a lovely subtle texture and prevent the artwork from looking too ‘solid’ or overworked.
- Setting the Mood: The colour of your paper can instantly help to establish the mood or atmosphere of your piece. For example, a soft, muted blue might lend itself beautifully to a misty landscape, while a warm, earthy tan could be perfect for a rustic still life or a glowing portrait.
- Making Colours Behave Differently: You'll notice that your pastel pencils can look quite different depending on the paper colour they're applied to. A yellow might look brighter on a dark blue, or more subtle on a cream. This optical interplay is part_._of the magic of working with pastels.
Tips for Choosing Your Coloured Paper:
It’s easy to feel a bit overwhelmed by the rainbow of choices available! Here are a few practical tips to guide you:
- Consider Your Subject: For many subjects, a neutral mid-tone is often a brilliant starting point. Greys, tans, muted greens, or blues are wonderfully versatile. They allow both your light and dark pastels to stand out clearly. I often reach for a paper like a mid-grey Canson Mi-Teintes or a soft buff Fabriano Tiziano as they are so adaptable.
- Think About Contrast: You generally want enough contrast for your lightest lights and darkest darks to have impact. If your paper is too light, your highlights might get lost. If it's too dark, you might struggle to make your darks read effectively without very heavy application.
- The "Temperature" of the Paper: This is a subtle but important point. Think about whether your subject calls for a warm background (creams, peaches, warm tans that can bring a lovely glow) or a cool one (blues, cool greys that might suggest distance or a different mood). It’s important that the paper colour harmonises with the colours you intend to use for your subject, rather than clashing with them.
I learned this lesson quite vividly myself! I once started a drawing of a little field mouse nestled amongst honeysuckle leaves, and I chose a beautiful green Pastelmat paper. I thought it would be a perfect base.
However, as I began working on the actual leaves of the honeysuckle, I realised the specific green of the paper was actually 'fighting' with the greens I was trying to lay down for the foliage – their colour temperatures just weren't compatible, and it was making the colours look a bit dull and off.
I ended up starting the whole piece again on a neutral grey Pastelmat, which allowed the greens of the leaves to really shine as I wanted them to.
The funny thing was, after meticulously drawing the mouse and the plant, I then decided to add a full background anyway and ended up covering all that lovely grey paper in the end!
It just goes to show that art takes you on unexpected journeys, but understanding how paper temperature can affect your subject colours from the outset can save you some initial head-scratching and ensure your colours work with the paper, not against it.
- Test, Test, Test!: This is my golden rule! Before you commit to a full drawing, grab some small scraps of the coloured papers you’re considering and make little test swatches with your key pastel pencil colours. See how they interact. Which paper makes your chosen colours pop the most? Which one gives you the mood you're after? This simple step can save a lot of guesswork.
- Don't Forget Lightfastness (of the Paper): While we often focus on the lightfastness of our pencils, it’s worth remembering that some deeply coloured papers can fade over time if exposed to light. Reputable artist-grade papers will usually have good lightfastness, but it's something to be mindful of if you plan to display your work.
Choosing a coloured paper isn't just a preliminary step; it's an integral part of your creative process with pastel pencils. It’s your ally in creating richer, more believable, and more atmospheric artwork. Don’t be afraid to experiment – you might just find your new favourite surface!
Getting a Handle on Paper Weight (GSM) for Pastel Pencils
Alright, we've explored the all-important 'grip' of tooth and texture, and the lovely impact of coloured papers.
The next key characteristic to get to grips with when choosing your pastel paper is its weight.
You'll usually see this measured in 'gsm,' which stands for 'grams per square metre' – essentially, how heavy and thick the paper is.
You'll find papers available in a whole range, from fairly light and flexible sheets (around 120-160gsm) right up to much more substantial, almost board-like cards (300gsm, 400gsm, or even more!).
And trust me, this isn't just a minor detail; the weight of your paper can really influence how it behaves with your pastel pencils and how your finished artwork holds up.
Let’s take a closer look at the practical implications for you:
Lighter Papers (Roughly 120gsm - 180gsm):
These lighter sheets are often easier on the wallet, which can be a plus, and they can be perfectly fine for quick practice sessions, initial sketches, or if your style involves a very light, delicate touch with minimal layering.
However, it’s good to be aware of a few things if you opt for a lighter paper.
- They are much more prone to buckling, creasing, or even tearing if you get a bit enthusiastic with pressure, try to erase vigorously, or build up many layers of pastel.
- If you introduce any moisture – perhaps from a fixative spray, or even a very light watercolour pencil underwash – these lighter papers will likely warp quite noticeably and can be tricky to flatten again.
My Tip for Lighter Papers:
- If you are going to use a lighter-weight pastel paper for a piece you care about, I really recommend taping it down securely to a drawing board on all four sides before you even begin.
This simple step makes a surprisingly big difference in keeping it flat and preventing annoying wrinkles or shifts as you work.
For an even more robust setup, particularly for very thin papers, some artists prefer to mount these sheets onto a rigid board first. It might seem like a bit of extra fuss, but it can honestly save you from a lot of potential frustration if your paper starts to misbehave!
Heavier Papers & Cards (250gsm and above):
Now we're talking about the more heavyweight champions! These more substantial papers and cards – and you'll find many of the wonderful specialist pastel surfaces like sanded papers, my beloved Pastelmat, or even some heavier artist-grade watercolour papers fall into this category – offer a much more robust and forgiving foundation for your pastel pencil work.
Here are the main advantages I find with these sturdier options:
- They can take a fair bit more punishment! You can apply more vigorous strokes, build up more layers of pastel pencil, and generally work with more confidence without them easily buckling, creasing, or showing signs of stress.
- They usually handle erasing or lifting techniques much better than their lighter counterparts.
- They provide a more durable surface for finished artwork, which is especially important if you're planning to frame your pieces or perhaps even sell them.
You generally don't need to pre-mount these heavier papers, which is a nice time-saver. However, I often still tape the edges down to my board, especially for larger pieces. It’s partly habit, but it just ensures everything stays perfectly flat and secure while I'm working.
So, to quickly sum up the weight debate:
While the paper's tooth (as we've discussed) is all about how much pigment it can grab and hold, its weight is more about its structural integrity – how well it physically stands up to your techniques and handling.
- For quick sketches, trying out ideas, or very light applications, a lighter paper can certainly do the job, provided you treat it with a bit of care.
- But for those pieces you're really pouring your heart into, especially if you envision lots of layers, energetic blending, or perhaps even using fixatives, a heavier, more durable paper will almost always give you a much better, more stable, and ultimately more enjoyable and frustration-free experience.
It just gives you that extra bit of confidence to work freely and really explore what your pastel pencils can do!
Exploring Pastel Paper Types: A Quick Guide and Links to My Reviews
Now that you've got a good understanding of the essential characteristics to look for in a pastel paper – its tooth, texture, weight, and colour – you're ready to explore the exciting variety of paper types available to pastel pencil artists!
Each type of paper offers a different experience and can beautifully enhance certain styles and techniques. To help you navigate the choices, I've grouped them into a few main categories below.
For each category, I'll give you a brief overview of what to expect. Then, because choosing a paper is such a personal and hands-on process, I’ve dedicated separate pages to my in-depth reviews of specific papers. On these review pages, you'll find:
- My detailed observations from hands-on testing.
- Close-up photos of my test swatches (showing how both Cretacolor pastel pencils and Faber-Castell Polychromos dry coloured pencils perform).
- Specific pros and cons I discovered for each paper when used with both types of pencils.
- My personal tips and recommendations to help you decide which might suit your needs best.
This main guide stays focused on the fundamentals, allowing you to then explore the reviews that most interest you. Let's take a look at the main players in the pastel paper world...
Traditional Pastel Papers (Often Lighter to Medium Weight)
First up are the Traditional Pastel Papers. These are often the types of papers that artists have used for pastel work for many years, typically ranging from lighter to medium weights (around 120gsm to 160gsm, sometimes a little more).
You'll find them in a lovely array of colours and with various subtle textures – some might have a classic 'laid' finish (fine lines), others a gentle, regular grain.
They can be a more budget-friendly option, especially when you're starting out or doing lots of practice sketches. While they might not hold as many layers as the more specialist surfaces we'll look at next, they can produce beautiful results with a thoughtful approach and are often favoured for their classic feel.
It's important to handle them with a bit of care, especially the lighter weights, to avoid creasing or buckling.
I've tested a range of these popular traditional papers, including well-known names like Canson Mi-Teintes (the traditional side), Fabriano Tiziano, and Daler Rowney's Ingres and Murano lines.
If you're curious about how they performed with both pastel pencils and dry coloured pencils, and whether they might be a good fit for your style, you can find all my detailed notes and photos below.
See My Detailed Reviews & Tests on Traditional Pastel Papers Here
Specialist Coated & Sanded Surfaces (Often Heavier Weight)
Next, we step into the realm of Specialist Coated, Sanded, and Textured Surfaces.
These papers are often where pastel pencil artists (and soft pastel artists too!) find they can truly unlock the medium's potential for rich, painterly effects.
Unlike traditional papers that rely on the inherent texture of their fibres, these surfaces have been specifically engineered or treated to provide exceptional tooth.
This might be a fine grit (like on sanded papers such as UART or Tim Fisher 400), a unique micro-abrasive texture (like Canson Mi-Teintes Touch or Velvet), or a special coating (like Art Spectrum Colourfix).
The incredible advantage of these papers is their capacity to hold a remarkable number of pastel layers.
This means you can build up deep, luminous colours, blend extensively, and even lift or rework areas with more freedom than on many traditional sheets.
They are typically heavier in weight, providing a robust and durable surface that can stand up to more vigorous techniques.
While they can be a bit more of an investment and may wear down your pencils a little faster, the results can be beautiful , allowing for a depth and richness that's hard to achieve otherwise.
If you're ready to explore papers that many artists consider game-changers, this is the category for you.
Discover My In-Depth Reviews of Specialist Coated, Sanded & Textured Surfaces Here
Velour Paper: A Uniquely Soft Surface
Prepare for a different tactile experience with Velour Paper.
Imagine a surface that feels more like a soft, fine velvet or felt than traditional paper – that’s exactly what you get with velour!
This unique characteristic means it interacts with pastel pencils in a very distinct way. The soft fibres have a gentle 'grab' that can be wonderful for creating exceptionally soft blends, dreamy atmospheric effects, or the delicate appearance of animal fur.
Working on velour often means edges will naturally diffuse a little, which can be a beautiful quality. However, if you're aiming for extremely crisp, sharp lines, it can present more of a challenge than on a firmer, less yielding surface.
Some artists absolutely fall in love with its unique properties and the ethereal look it can impart, while others might find its softness takes some getting used to or that it requires a lighter touch.
It's definitely a paper that invites a slightly different approach to your pastel application.
I’ve focused my testing in this category on the well-known Hahnemühle Velour, and I’m eager to share my findings on this rather luxurious surface.
Explore My Experiences with Hahnemühle Velour Pastel Paper Here
Spotlight on Our Perennial Favourites
While this guide, and my detailed reviews, focus on papers specifically manufactured and marketed for artists using pastels, you might occasionally hear about or be tempted by other types of surfaces, especially if you have an experimental streak!
For instance, some very inventive artists have explored using things like fine-grade commercial sandpapers from the hardware store, or other materials not originally intended for artwork.
My advice here, particularly if you're still building your confidence and skills with pastel pencils, is to approach these non-artist-grade surfaces with a degree of caution.
While the texture of something like an industrial sandpaper might seem appealingly gritty at first glance, these materials aren't generally designed with the needs of an artist, or the longevity of artwork, in mind.
This can mean a few things:
- Unknown Archival Quality: Materials not made for art may not be acid-free or lightfast. This means they could yellow, degrade over time, or even adversely affect your pastel pigments, which would be heartbreaking after you've spent hours on a piece.
- Inconsistent Surfaces: The texture and quality might not be consistent, or they could contain impurities that make pastel application difficult or unpredictable.
- Potentially Too Harsh: Some non-artist surfaces can be excessively abrasive, leading to very rapid wear of your precious pastel pencils, or even be uncomfortable for your fingers if you blend with them.
- Frustration Factor: Ultimately, while experimentation is a wonderful part of art, using materials that aren't sympathetic to the medium can sometimes lead to more frustration than success, especially when you're trying to learn how pastel pencils behave best.
For the most reliable, rewarding, and enjoyable experience as you get to know your pastel pencils and develop your techniques, I truly believe you'll be best served by starting with, and primarily using, the wonderful range of papers specifically designed for artists that we've discussed in this guide.
They are formulated to bring out the best in your pastels and support your artistic journey with quality and consistency.
That’s why I’ve concentrated my detailed testing and reviews on these artist-grade options.
Your Pastel Paper Adventure: What's Next?
Well, we've certainly covered a good deal of ground in this guide to understanding the essentials of pastel paper!
You're now equipped with a much clearer picture of how vital a paper's tooth and texture are for gripping your pastel pigments, how its weight (GSM) affects its sturdiness and your working methods, and the beautiful ways that carefully chosen coloured paper can enhance your artwork.
Armed with this foundational knowledge, you're in a fantastic position to start making informed choices that will support your art.
The truth is, while understanding these core principles is absolutely key, discovering your personal favourite pastel paper – the one that just clicks with your style and the way you love to work – is often a journey of experimentation.
What one artist adores, another might find less suited to their touch, and that's perfectly okay!
That's why I'm such a firm believer in trying a few different options for yourself.
And to help you navigate that experimentation with confidence, your next step is to explore my detailed, hands-on reviews of the specific paper categories and brands we've touched on.
In these linked "spoke" pages, you'll find:
- My honest, in-depth thoughts and observations from testing each surface.
- Clear, close-up photos of my test swatches, showing how each paper performed with both Cretacolor pastel pencils and Faber-Castell Polychromos dry coloured pencils.
- The specific pros and cons I discovered for each paper when used with both types of pencils.
- My personal tips and recommendations to help you decide which might be your perfect paper partner!
Whether you're keen to learn more about:
- The classic charm and feel of Traditional Pastel Papers
- The incredible layering power of Specialist Coated, Sanded & Textured Surfaces
- The unique, gentle touch of Velour Paper
- Or the much-loved qualities of Pastelmat
...there's a wealth of practical information waiting for you on those dedicated pages.
My sincere hope is that this guide and the accompanying detailed reviews will help you sidestep some of the initial frustrations that can come with a new medium (like my early battles with Ingres paper!).
I want to help you find surfaces that make your pastel pencil journey a genuine pleasure, allowing you to focus on creating the beautiful art you envision.
So, I encourage you to perhaps make a cup of tea, browse through the review pages that pique your curiosity, and then, most importantly, try to get your hands on a few different types of paper to feel them for yourself. There’s nothing quite like that firsthand experience.
Happy experimenting, and I wish you many joyful and creative hours with your pastel pencils!

I'm Carol Leather, a coloured pencil artist for over 15 years. Most of my teaching comes back to the same idea: realistic coloured pencil starts with structure, light and observation long before the colour goes down.
My work has featured in Ann Kullberg's Color Magazine, CP Magic and Color Pencil Treasures (vol 7). I'm a member of the UKCPS and was a prize winner in the Nature section of their Annual Open Exhibition in 2020.
You might like these
Best Paper for Coloured Pencils: Tested & Compared
We test smooth and textured papers for coloured pencil work. See our side-by-side comparisons and find the best paper for your style and budget
Best Fixative for Coloured Pencils: Types, Brands & How to Apply
Workable or final fixative? Which brands work best for coloured pencil and pastel? How to apply without ruining your artwork. UK and European brands tested.
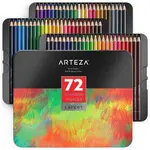
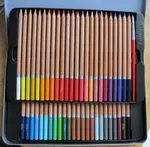
Arteza Coloured Pencils: Budget-Friendly but Lightfast Enough?
Arteza coloured pencils: A budget-friendly option for beginners. Our UK review explores their usability, but cautions on lightfastness for serious artwork.


Copyright © 2009- pencil-topics.co.uk All rights reserved
Home | About Us | Contact Us | Privacy Policy