- Home
- Tools/Accessories
- Eraser for Coloured Pencils
Best Erasers for Coloured Pencils: Which Type Works and How to Use Them
Ever spent hours on a coloured pencil drawing, only to make a heart-wrenching mistake?
Erasing coloured pencil can be daunting, but it's not impossible!
With the right tools and techniques, you can correct mistakes, lift colour, and create beautiful highlights.
This guide aims to demystify erasers for coloured pencil art, helping you choose the best ones for your needs and use them confidently. Think of it as your friendly companion, here to help you erase mistakes and any fear of making them.
Erasing Coloured Pencils: What Beginners Need to Know
Understanding a few basics about erasing coloured pencils can save you frustration. Let's explore these fundamentals before exploring the different types of erasers and their uses.
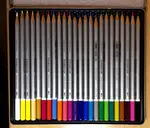
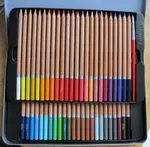
- Coloured Pencil Isn't Graphite: Graphite pencils leave loose particles on the paper surface, making them easy to erase. Coloured pencils, however, use wax or oil-based binders that help colours stick to the paper, making them harder to remove.
- Your Paper Plays a Starring Role: The type and quality of your paper greatly impact how well coloured pencil can be lifted. Good quality, sturdy artist paper withstands erasing better than thinner types. Papers with texture hold pencil well, but can make it harder to remove pigment. Smoother papers release pigment more easily, but may show erasing marks. (Learn more in my Best Paper for Coloured Pencil Guide.)
- It's About Lightening, Not Obliterating: Successful 'erasing' with coloured pencils often means lightening an area enough to rework it or make it less noticeable. Complete removal may not be possible, especially with multiple layers or strong colours.
- Application Matters – A Lot!: How you apply coloured pencils affects future adjustments. Gentle layers are easier to modify than heavy pressure applications.
- Some Pigments Like to Stick Around (Staining): Deep reds, vibrant blues, and some intense yellows can sometimes leave a faint tint behind, no matter how carefully you try to erase them.
- Effective Erasing is a Skill: Using an eraser with coloured pencils requires technique, patience, and understanding of how pencils and paper interact. It's not just about the tool, but how you use it.
Understanding these realities isn't meant to discourage you – far from it!
It's about empowering you with knowledge.
Knowing what to expect helps you make smarter choices about materials and techniques, leading to more satisfying results.
Know Your Erasers: A Detailed Look at Types & Brands
Having the right eraser can make a big difference in your success and confidence.
Here, we'll cover the main types of erasers effective for coloured pencil work, including their best uses, techniques, and potential pitfalls.
Understanding these tools will give you more control over your artwork and help you make adjustments with ease.
Kneaded Erasers: A Gentle Shaper & Lifter
A kneaded eraser is a soft, pliable tool that lifts pigment from paper without rubbing. To use, press or dab it onto the area and it will gently pull up coloured pencil particles. Clean it by stretching and folding it into itself.
Best For:
A kneaded eraser is more than just a mistake corrector - it's a creative tool. It shines when a gentle touch is needed.
- Lifting coloured pencil layers
- Creating subtle highlights and softening colour transitions
- Lightening areas without hard edges
- Removing minor smudges and fingerprints
- Softening graphite pencil lines
Techniques for Effective Use:
- Keep it clean by kneading regularly
- Shape it for the task at hand (fine point for details, rounded shape for larger areas)
- Dab, don't drag, to avoid smearing or damaging pencil work
Limitations and Potential Pitfalls:
- Not for removing thick or waxy coloured pencil layers
- Can become sticky over time, indicating it's time for a replacement
My Top Tip
Store your kneaded eraser in an airtight container to keep it clean, dust and pet hair-free.
Consider brands like Faber-Castell, Staedtler, Winsor & Newton, and Daler-Rowney for consistent quality.
Precision Stick Erasers: For Fine Details and Crisp Highlights
Precision stick erasers have a thin eraser core in a plastic or metal casing, often with a clickable button to advance the eraser. Having refills available makes them cost-effective and a sustainable choice.
Best For:
- Creating fine lines and details
- Lifting small areas of color
- Adding sharp highlights to eyes, metallic surfaces, and hair
- Working with stencils for precise edges
Effective Eraser Techniques:
- Use a light touch to gently lift pigment
- Advance the eraser carefully to avoid breakage
- Protect your paper by extending the eraser beyond the casing
- Choose the right tip shape for various effects
Limitations of Fine Point Erasers:
- Not ideal for erasing large areas due to their fine point.
- Eraser tips can wear down quickly, especially on rough paper.
- May be too harsh for delicate or soft papers; test on a scrap piece first.
- Casing can damage artwork if eraser isn't extended enough.
Popular UK Options: The Tombow Mono Zero eraser is a top choice, available with round and rectangular tips. Similar precision erasers are also offered by Staedtler and can be found in UK art supply shops and online.
Battery-Operated Erasers: Power and Precision
Battery-operated erasers are small, handheld tools that spin a replaceable eraser tip at high speed, lifting pigment effectively. They require standard batteries and come with eraser refills.
Best For:
- Creating sharp highlights, especially in darker areas
- Lifting stubborn layers of coloured pencil
- Rescuing overworked areas (with caution)
- Creating textures and effects by "drawing" with the eraser
Techniques for Effective Use:
- Use a light touch, letting the motor do the work
- Practice on scrap paper to get a feel for the eraser's power and motion
- Use short, controlled bursts and vary the angle of the eraser
- Choose the right eraser tip hardness for your paper
Limitations and Potential Pitfalls:
- Can be very aggressive and damage paper if too much pressure is used
- Not suitable for delicate surfaces like Pastelmat
- Can be noisy and require frequent battery and tip replacements
My Top Tip
Try before you buy, if possible, to find a comfortable and controllable eraser.
Popular Examples:
The Derwent Battery Operated Eraser is a popular choice in the UK, known for its control. Other brands like AFMAT and Jakar are also available online. Consider the ergonomics before purchasing.
Beyond Dedicated Erasers: DIY Alternatives and Clever Lifting Tips
Purpose-made artist erasers are usually best for correcting coloured pencils, but sometimes you might need an alternative.
Artists have found that certain household items can be adapted for lifting pigment or making small adjustments.
Here, we'll explore common DIY alternatives. Keep in mind that these methods are 'use-at-your-own-risk' and should be tested on scrap paper before using on valuable artwork.
Blu-Tack as a Kneaded Eraser Alternative
Blu-Tack is a reusable mounting putty that can be used to lift pigment in coloured pencil artwork. It's a pliable, slightly sticky substance that can be shaped to a point for detailed work.
While Blu-Tack can be effective, it has some limitations.
It can be hard to knead to a soft state, making it uncomfortable to use for some.
Because it's quite sticky, it can also be surprisingly noisy as you pull it away from the paper surface!
To use Blu-Tack safely, use a gentle dabbing motion and test it carefully first. The white version may reduce the risk of colour transfer.
While Blu-Tack can be a handy alternative to a kneaded eraser, it's not recommended for archival art or critical pieces. A dedicated kneaded eraser is generally preferred for its control and gentleness.
Magic Tape
Magic Tape can be useful for lifting tiny, specific spots or errant marks of coloured pencil, especially if the pigment is sitting lightly on the surface. To use it effectively:
- Cut a small piece of Magic Tape and position it over the area to adjust, without pressing it down.
- Use a sharpened pencil to gently push the tape down, selectively pressing the sticky side onto the pigment.
- Carefully lift the tape straight up. The unwanted mark should lift with it, leaving the surrounding area untouched.
However, this technique requires a gentle and precise approach to avoid damaging the paper or removing too much pigment.
Practice on a non-important surface first, as the adhesive is not designed for archival art purposes.
My Verdict:
Magic Tape can be a lifesaver for tiny, errant flecks of pigment, but approach with caution and practice the light touch needed. I wouldn't recommend it as a primary erasing tool.
Erasers to Avoid with Coloured Pencils
When experimenting with art materials, some erasers can harm your artwork. Here are a few to steer clear of:
- Erasers on the end of graphite pencils: These erasers are too harsh for coloured pencils and can smear colours, damage paper, and fail to lift pigment.
- Novelty and Children's Erasers: These erasers are inconsistent in quality, may contain oils or chemicals, and don't perform well with coloured pencils.
- Traditional Ink Erasers: These erasers are too abrasive and can scuff, tear, or damage paper surfaces.
- "Magic Erasers" (Household Cleaning Sponges): These sponges are difficult to use accurately, don't lift coloured pencil effectively, and may damage paper.
Stick to artist-quality erasers for your coloured pencil artwork.
My Top Tips for Successful Erasing and Lifting
When working with coloured pencils, erasing can be challenging, but with the right approach, you can achieve great results.
Here are my top tips to help you make corrections and adjustments successfully:
- Embrace the Gentle Approach: Use a light and patient hand when erasing coloured pencil. Apply gentle pressure and let the eraser do the work. Avoid scrubbing hard, as this can lead to smudging or damage to the paper.
- Layer by Layer is Key: Remove coloured pencil pigment a thin layer at a time, especially when working with multiple layers. This gives you more control and reduces the risk of damaging the paper.
- Understand Staining and Set Realistic Expectations: Some coloured pencil pigments can be staining, especially dark or vibrant ones. Set realistic expectations and aim to lighten an area enough to rework it, rather than trying to remove it completely.
- Start with Light Pencil Layers: Prevention is better than cure. Apply coloured pencil in light, delicate layers to make corrections easier.
- Always Test First: Before using an eraser on your artwork, test it on a scrap piece of the same paper to prevent any nasty surprises.
- Consider Your Paper's Role: Your choice of paper affects how successfully you can erase. Choose sturdy, good-quality artist-grade papers to withstand careful erasing.
- Keep Your Eraser Clean: Always check your eraser before using it and clean it on a scrap piece of paper if necessary to prevent smearing unwanted colour.
- Brush Away Debris Carefully: Use a soft brush or a gentle puff from a Rocket blower to remove debris from erasing. Avoid wiping with your hand, as this can smudge your work.
- Patience is Your Superpower: Erasing coloured pencil effectively takes time and care. A gentle, patient, and methodical approach yields better results than rushing or forcing the pigment off the page.
Troubleshooting Common Erasing Woes (FAQs)
Q: Help! I've rubbed a hole right through my paper while erasing! What did I do wrong, and can it be fixed?
A: Don't worry, it's happened to the best of us! Damaging your paper while erasing can be disheartening, but it's a valuable learning experience. Let's explore the common culprits behind paper damage and how to prevent it.
Why Does Paper Get Damaged During Erasing?
- Too Much Pressure: Applying too much pressure while erasing can break down paper fibers, leading to thinning, pilling, or holes.
- Wrong Eraser: Using an abrasive eraser can damage paper, especially with colored pencil work.
- Overworking One Spot: Repeatedly erasing the same area can weaken paper fibers.
- Paper Quality: Thinner, lower-grade papers are more susceptible to damage.
Prevention is Key
Most paper damage is preventable. To avoid damage:
- Be Gentle: Use a light touch while erasing.
- Test First: Test your eraser on a scrap piece of paper.
- Choose Wisely: Select an eraser suitable for colored pencils and your paper type.
- Work in Light Layers: Apply colored pencil in light layers for easier adjustments.
- Be Patient: Work slowly and lift color gradually.
Can Damaged Paper Be Fixed?
While it's difficult to perfectly fix damaged paper, minor thinning can be carefully worked over.
Small tears or holes on sturdy paper can be patched with archival mending tissue or a small piece of the same paper.
However, prevention is the best approach. Focus on being gentle with your paper and learn from your mistakes to create beautiful, undamaged art.
Q: Why is my eraser smearing the pencil instead of lifting it?
A: Trying to erase a small mistake can be frustrating, especially when it leads to a smear. Understanding the common reasons behind this issue can help you avoid it.
Here are the main causes:
- Too Much Pigment or Wrong Eraser: Using the wrong eraser or too much pigment can push the colour around instead of lifting it cleanly.
- Rubbing Instead of Dabbing: Rubbing can grind the pigment into the paper or cause it to skid, leading to smears. Try a gentle dabbing motion instead.
- Dirty Eraser: A dirty eraser can transfer old pigment onto your current drawing. Clean your eraser before use by rubbing it on scrap paper.
- Waxy Pencils and Smooth Paper: Waxy pencils and smooth paper can make erasing more prone to smearing.
- Using the Wrong Eraser: Avoid using graphite pencil erasers, as they can be too harsh or ineffective on coloured pencil pigment.
To Prevent Smearing
- Use a light touch.
- Try a dabbing motion with a kneaded eraser.
- Ensure your eraser is clean.
- Test your eraser on scrap paper before using it on your artwork.
- Be gentle when working with waxy pencils or smooth paper, and consider using a precision eraser for small areas.
Q: The colour is lighter, but I can still see a 'ghost' of the mark. Is that normal?
Why Coloured Pencil Marks Can Leave a 'Ghost'
Sometimes, a faint mark remains even after erasing coloured pencil. This is normal and happens for a few reasons:
- Staining Pigments: Some coloured pencil pigments, like vibrant reds and blues, can leave a tint behind in the paper fibres.
- Pigment in the Paper's Tooth: Tiny particles of pigment can remain deep in the paper's texture, even after erasing.
- Indentations from Pressure: Firm pressure can create a slight indentation in the paper surface, making the mark still visible.
- Coloured Pencil isn't Graphite: Coloured pencils behave differently to graphite and aren't designed to be completely erasable.
Working With Ghost Marks
- Layering Over is Often Fine: If a ghost mark remains in an area that will be covered with more layers, it usually won't affect the final outcome.
- When Ghosts are More Troublesome: If the ghost mark is on bare paper or a pale section, you can try adjusting your drawing or adding a light background to unify the area.
- Solutions for Obvious Ghosts: You can adjust your drawing, incorporate the ghost into a new shadow or texture, or add a light background to make the mark less noticeable.
A Tip for Next Time
To minimise noticeable edges when erasing, gently work your eraser from the outside of the mark inwards towards its centre. This can help soften the edges and make any remaining trace less defined.
Remember, seeing a faint ghost mark is part of the coloured pencil process. Learning to work with them is all part of developing your skills!
Q: How do I clean my dirty kneaded eraser?
A: Cleaning your kneaded eraser is simple. Here's how:
- Knead like bread dough: Stretch and pull the eraser in one direction, then fold it back on itself. Repeat this motion from different angles.
- Work in the dirt: Continue kneading until the surface pigment disappears into the centre of the eraser, exposing a cleaner surface.
- Check if it's clean: Test the eraser on spare paper. If it lifts cleanly without leaving smudges, it's ready to use.
- Don't throw it away yet: A kneaded eraser can last a long time. As long as it's pliable and lifts pigment effectively, it's still usable.
- Important note: Keep separate kneaded erasers for coloured pencil, graphite, and charcoal work to avoid smearing dark marks onto your colours.
Q: Can I completely erase heavily burnished coloured pencil?
A: Unfortunately, the answer is generally no. Burnishing makes erasure difficult by compressing pigment deep into the paper, creating a dense and sealed surface.
- Why Burnishing is Hard to Erase: Burnishing grinds pigment into the paper, making it nearly impossible to remove. You might lift a hint of surface colour with an aggressive eraser, but it's unlikely to make a noticeable difference.
- The Best Approach: Consider a burnished area permanent. Be sure about your colours, values, and details before committing to burnishing. If unsure, build up layers gently and hold off on burnishing until you're satisfied. Approach burnishing with a clear plan, knowing it's not easily undone.
Erasing, Adjusting, and Creating with Confidence!
Now that we've explored the world of erasers in coloured pencil art, I hope you feel empowered to choose the right tools and techniques for your creative journey.
Working with coloured pencils is a unique experience, and making adjustments is a normal part of the process.
It's not just about correcting mistakes, but also about refining edges, creating soft highlights, and tweaking hues to bring your vision to life.
Think of erasers as part of your toolkit for expression, offering control and flexibility.
Experiment with different types of erasers, remembering to apply them gently and test first. As you become more familiar with their performance, your confidence will grow, and the fear of making mistakes will lessen.
Happy creating!

I'm Carol Leather, a coloured pencil artist for over 15 years. Most of my teaching comes back to the same idea: realistic coloured pencil starts with structure, light and observation long before the colour goes down.
My work has featured in Ann Kullberg's Color Magazine, CP Magic and Color Pencil Treasures (vol 7). I'm a member of the UKCPS and was a prize winner in the Nature section of their Annual Open Exhibition in 2020.
You might like these
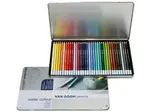
Royal Talens pencils
All about the Royal Talens line of coloured and watercolour pencils.
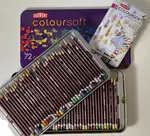
Derwent Coloured Pencils Compared: Which Range Is Right for You?
Compare Derwent pencil ranges side-by-side: Lightfast, Coloursoft, Procolour & more. Honest reviews to help you choose the right set for your work
Best Paper for Coloured Pencils: Tested & Compared
We test smooth and textured papers for coloured pencil work. See our side-by-side comparisons and find the best paper for your style and budget


Copyright © 2009- pencil-topics.co.uk All rights reserved
Home | About Us | Contact Us | Privacy Policy